Custom Leather Hat Patches for Caps and Trucker Hats
Engraved or debossed leather patches sized for cap fronts.
Leather patches for caps, made to order from your artwork. Free proof in 24 hours and no minimum. Choose the leather, finish and shape.
MATERIAL
Genuine Leather or Faux Leather for a Cap Patch?
A cap curves. Your patch has to curve with it. The material decides whether it does.
| Material | Look | Flex | Ageing | Best for |
|---|---|---|---|---|
| Full-grain | Natural, rich grain | Good after break-in | Darkens, patina | Premium caps |
| Top-grain | Even, smooth | Good | Mild patina | Everyday caps |
| Split | Flat, less grain | Fair | Wears sooner | Light-duty caps |
| PU faux | Uniform, matte | Very good | No patina | Large runs |
Hide grades differ in strength and stretch. A cap crown flexes when you wear it and fold it. A stiff patch can crack or lift.
Hat Panel Leather: Which Grade Bends Without Cracking
- Top-grain bends evenly and looks clean
- Full-grain flexes well after break-in
- Split leather can crack on a tight curve
Faux Leather: Consistent Colour for Large Runs
- Color matches from run to run
- PU leatherette is thin and flexible
- No hide marks or scars
Which Leather Holds Up Best on a Hat
- Full-grain ages best in the sun
- Top-grain is a balanced pick
- Faux wipes clean with ease
- Full-grain
- The whole natural surface, grain intact.
- Top-grain
- Sanded smooth for an even look.
- Split
- The lower layer, flatter and thinner.
- PU leatherette
- A coated fabric made to look like leather.
Color range depends on the leather. Natural, brown and sand tones are common. Ask what is available before you design.
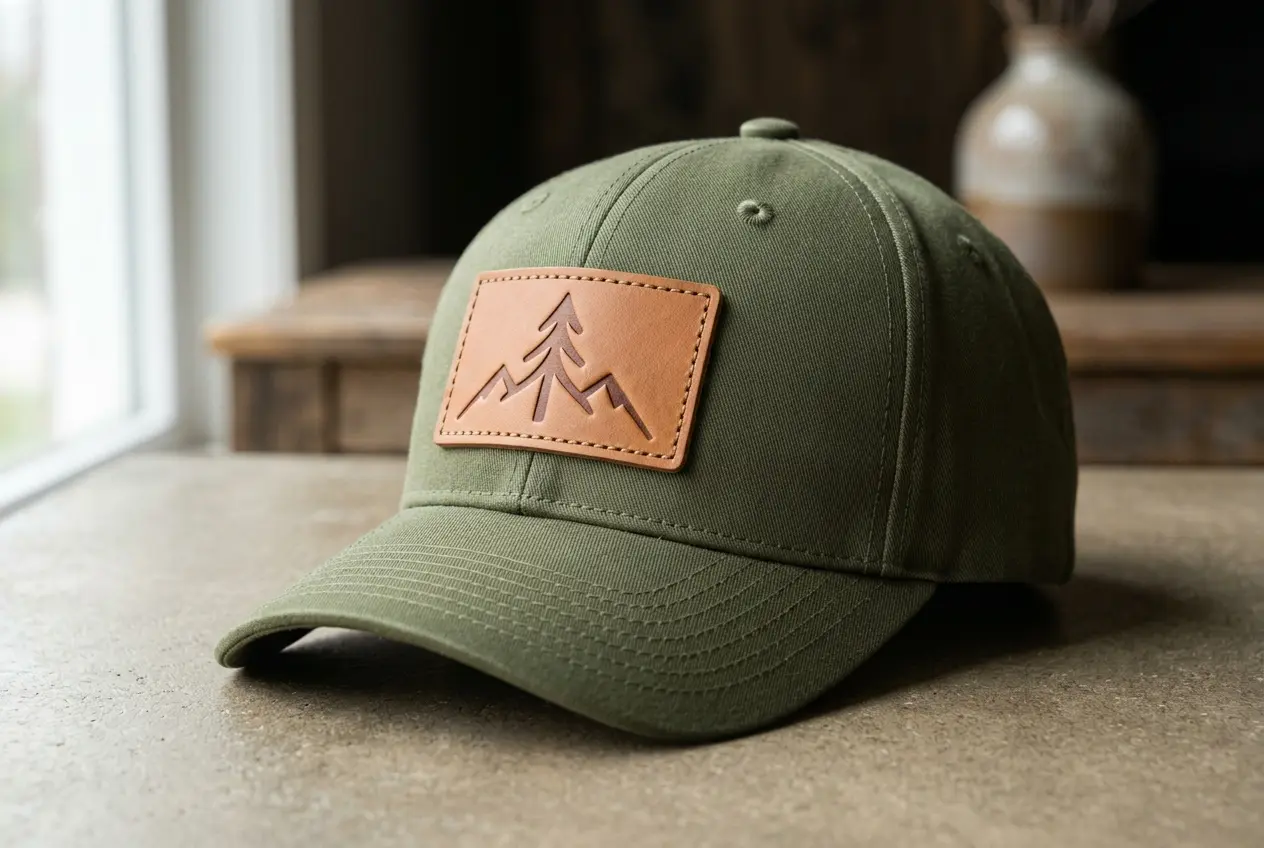
THICKNESS
What Is the Ideal Thickness for a Leather Hat Patch?
Trade guidance points to 4 to 5 oz for caps. That is about 1.6 to 2.0 mm. Treat it as guidance until your quote confirms our stock.
| Weight | Millimeters | Feel | Cap verdict |
|---|---|---|---|
| 3 oz | About 1.2 mm | Soft, thin | Can look floppy |
| 4 oz | About 1.6 mm | Flexible | Good fit |
| 5 oz | About 2.0 mm | Firm | Good, a bit stiffer |
| 6 oz | About 2.4 mm | Stiff | Too thick for most caps |
Pros
- Bends with the crown
- Sits flat on the panel
- Edges stay down
Limits
- Too thick: edges lift
- Too thin: looks floppy
- Wrong weight: patch may curl
Thickness is a trade-off. Too much and the patch fights the curve. Too little and it loses its premium feel.
Why Leather That Bends With the Crown Beats Stiff Leather
A crown is curved. Stiff leather resists that curve. A flexible patch follows it and stays put.
What Goes Wrong When the Patch Is Too Thick or Too Thin
Thick leather lifts at the edges. Thin leather can look limp. Pick the middle weight.
- Ask which weights we stock
- Share your cap style
- Check the crown curve
THE MARK
Custom Leather Patches for Hats: Laser Engraved or Debossed
A cap front is small. Detail has limits. Two methods fit it best.
| Method | Look | Best detail | Limit |
|---|---|---|---|
| Laser engrave | Dark burned lines | Fine text, line art | Keep lines bold |
| Deboss | Pressed-in shape | Bold logos | Skips tiny detail |
Laser Engraving at Cap-Front Scale: How Fine the Detail Can Be
- Fine lines can burn too thin
- Bold text reads best
- Avoid small tight gaps
Laser engraving burns the design into the surface. Fine lines can fill in on a small patch. Check line weight on your proof.
Debossing at Cap-Front Scale: Bold Shapes Win
- Simple shapes press cleanly
- Skip hairlines and tiny text
- Use one strong focal mark
Debossing presses the shape into the leather. It reads best in bold areas. One strong mark beats a crowded design.
We accept AI, EPS and PDF files. PNG, JPG and SVG also work.
SIZES
Leather Patch Sizes and Shapes for Cap Fronts
| Shape | Example size | Fits | Note |
|---|---|---|---|
| Rectangle | 2 1/8 x 3 3/8 in | Most caps | Classic front |
| Oval | 3 x 3.5 in | Trucker fronts | Softer look |
| Hexagon | 3 x 3.5 in | Structured caps | Bold shape |
| Front panel | About 2 x 3 in | Standard panel | Measure first |
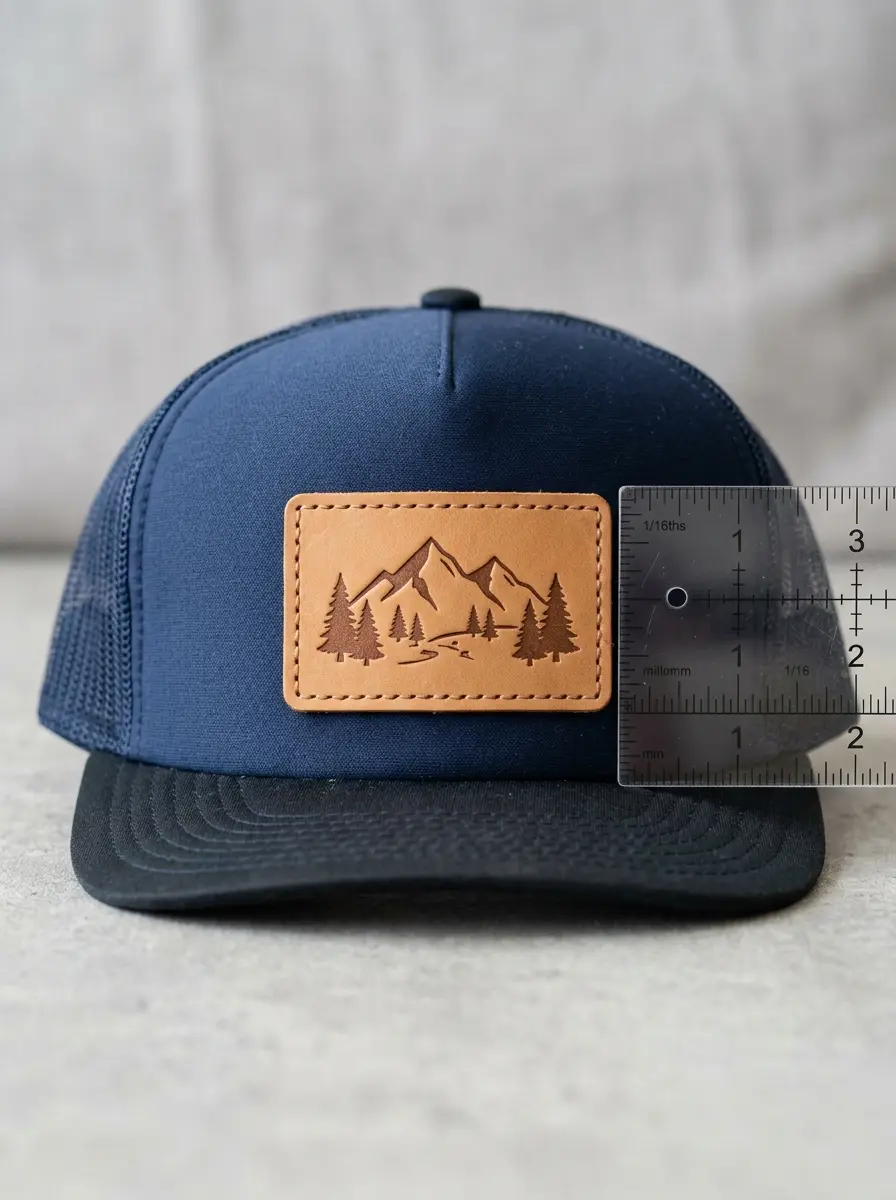
- Measure the panel first
- Leave a margin around the patch
- Round the corners
- Test with a paper template
A paper template saves a costly mistake. Cut it to size and tape it on. Step back and check the balance.
Rectangle, Oval and Hexagon Leather Patches
Rectangles suit most caps. Ovals soften the look. Hexagons add a bold edge.
Sizing a Custom Leather Patch Trucker Hat Front
A trucker front has a foam panel and a center seam. Measure the panel, not the hat. Keep the patch off the seam.
Check the crown height before you order. A low crown needs a smaller patch. A tall crown carries a wider one. Center the patch on the front panel.
CAP STYLES
Which Cap Styles Take a Leather Patch?
| Cap style | Takes a rigid patch? | Note |
|---|---|---|
| Trucker | Yes | Foam front helps |
| Snapback | Yes | Flat or curved bill |
| Structured dad cap | Yes | Firm crown holds shape |
| Unstructured cap | Sometimes | Soft crown may buckle |
| Beanie | Different job | See link below |
- Trucker caps suit most sizes
- Dad caps hold shape well
- Soft crowns need a smaller patch
- Check the panel before ordering
Not sure which style you have? Send a photo of the cap front. We can suggest a patch size from it.
Beanies are a different job. See leather patch labels. For other materials, read hat patch options.
ATTACHING
Custom Hat With a Leather Patch: Heat Press, Stitch or Adhesive
A custom hat with leather patch fronts is a classic look. You can fix a patch three ways. Each has a trade-off. Pick by how often the cap gets worn.
| Method | Hold | Risk | Who does it |
|---|---|---|---|
| Heat press | Strong when done right | Can mark leather | Hat shop or you |
| Stitch | Strongest | Needle holes | You or a tailor |
| Adhesive | Light | Peels over time | You |
- Measure the front panel.
- Check your patch backing.
- Mark the spot with a template.
- Fix it by the supplied method.
- Let it rest before wearing.
Rest time lets the bond set. Skip the shower and the sun for a day. The supplied instructions give the exact advice.
- Backing type
- Press or iron available
- Cap material
- Cap crown shape
How Long to Press a Leather Patch and What to Confirm First
Press time depends on the backing and the press. We do not publish a fixed number. Use the instructions that come with your patches.
Ask your hat shop about their press. Settings vary from shop to shop.
Stitching Versus Bonding: Which Holds Longer
Stitching usually holds longer. Bonding is faster but can lift. See how to sew a patch for the stitching steps.
Glue and Self-Adhesive Backing: Do They Work?
They work for short-term use. Sweat and heat can loosen them. Stitch or heat for daily wear.
Heat and stitch together give the best hold. Heat sets the patch. Stitching locks the edge.
CARE
Caring for a Leather Patch Cap: Sun, Sweat and Rain
- Wipe with a damp cloth
- Dry flat, away from heat
- Use conditioner sparingly
- Do not soak the cap
- Do not scrub the patch
- Avoid long hours in hot sun
Sun and sweat change leather over time. That is part of the look. Rain spots dry out if you blot them.
- Store the cap off the dash
- Keep it out of direct heat
- Brush off dust gently
Rotate your caps through the week. Leather rests and dries between wears. That slows cracking along the fold.
COST
What Sets Leather Hat Patch Pricing
Price for custom leather hat patches depends on five drivers.
| Driver | Effect |
|---|---|
| Size | More leather used |
| Material | Cost per patch |
| Decoration | Setup and time |
| Quantity | Cost per patch |
| Attachment | Extra step |
- Share your size and shape
- Name the leather type
- State your quantity
- List your mark and finish
Bigger runs lower the cost per patch. Simple art also costs less. Share your quantity early.
SPEC SHEET
Leather Hat Patch Spec Sheet: What to Tell Us
- Leather: top-grain, full-grain or faux
- Thickness, such as 4 to 5 oz
- Mark: engrave or deboss
- Size and shape
- Attachment method
- Quantity
Fill it in once. Your free proof then shows every choice. You can revise before approval.
Proof, shipping and turnaround live on our home page.
READY TO ORDER
Custom Leather Patch Hats No Minimum: Order Your Patches With a Free Proof
Upload Artwork
Send any common file format.
Approve Your Proof
Free digital proof within 24 hours.
We Ship Worldwide
Standard 10 to 14 business days. Rush in 5.
Upload your artwork and choose a leather. Your free proof arrives in 24 hours.
No minimum. Free proof in 24 hours. Rush is 5 business days after proof approval.
COMMON QUESTIONS
Leather Hat Patch Questions, Answered
What is the ideal thickness for a leather hat patch?
Trade guidance says about 4 to 5 oz, or 1.6 to 2.0 mm. That bends with a curved crown. Confirm our stock on your quote.
What leather should I use for hat patches?
Thin top-grain, full-grain or PU faux all work. Choose even color and a flexible feel. Ask which types we stock.
What type of glue should I use to secure leather patches on my hat?
Stitching or heat sealing holds best. Contact adhesive can work for light use. Follow the instructions supplied and test on a spare piece first.
How long do you press a leather patch on a hat?
Follow the instructions supplied with your patches. Press time depends on the backing and the press. We do not publish a fixed number.
Do self-adhesive leather patches work?
For short-term use only. Peel-and-stick backing can lift with sweat and heat. Stitch or heat press for daily wear.
Can you supply patches for custom hats with leather patch fronts?
Yes, we supply the patch only. You or your hat maker attaches it. Ask us if hat supply is available.
Do you make leather patch hats custom, or only the patches?
We make the patches only. Pair them with your own hats. Attach them by heat, stitch or adhesive.
How big should a leather patch be on a cap front?
A front panel is often about 2 x 3 inches. Measure yours, then check the size table above.
Are custom leather patch hats expensive?
Finished hats usually cost more than patches alone. We price the patch only. See our pricing page and ask for a quote.
Who makes custom leather patches for hats?
We make the patch from your art. There is no minimum order, and your free proof arrives in 24 hours.
What machine makes leather hat patches?
Makers typically use a laser engraver or a heated die. A press then bonds the patch to the cap.
Do leather hat patches survive rain and sweat?
Leather handles splashes, not soaking. Wipe it dry and keep it away from heat. See the care section above.
What leather color looks best on a black cap?
Tan and natural leather stand out on dark caps. Dark brown blends in. On a light cap, brown or black gives contrast. Hold a swatch against the cap front first.
KEEP EXPLORING