Ironing Patches on Hats and Other Ways to Attach Them
Iron, press, sew or swap. Pick the method by crown type.
Learn how to put patch on hat fronts without puckers or scorch marks. Match the method to your crown, then order a custom patch.
QUICK PICK
Quick Pick: Iron, Press, Sew or Hook-and-Loop for Your Cap
You need to know how to put patch on hat styles. They all behave differently. A snapback is not a beanie. Ironing patches on hats suits only some of them.
| Cap type | Best method | Avoid |
|---|---|---|
| Cotton twill baseball cap | Iron or hat press | Steam |
| Structured snapback | Hat press or stitching | Flat clamshell press |
| Unstructured dad hat | Iron with support | Pressing the crown flat |
| Mesh trucker | Stitch the front panel | Heat on mesh |
| Beanie or knit cap | Stitching | High heat |
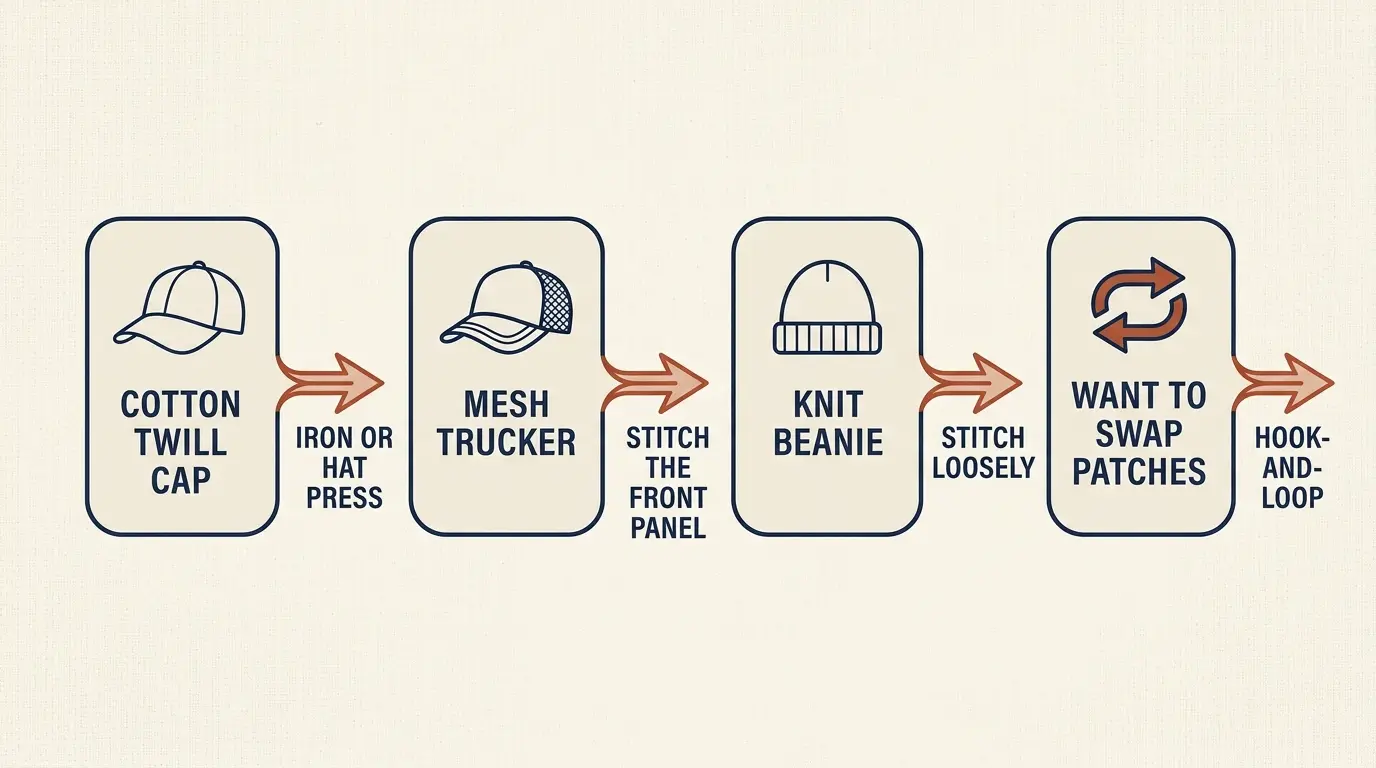
- Cotton twill takes heat best
- Mesh and foam fear heat
- Knit caps prefer thread
- Swapping patches? Add hook-and-loop
- Iron
- Cheap and handy. Needs support inside the cap.
- Hat press
- Curved plate. Even pressure across the crown.
- Stitching
- Works on every cap. Takes the longest.
- Hook-and-loop
- Lets you swap patches. Needs a sewn loop panel.
Not sure which fits? Check the fabric tag inside the cap. Cotton and cotton blends take heat. Polyester and nylon need less heat, or thread.
Think about wear too. A cap rides in bags and gets sweaty. Heat bonds can soften with sweat. Stitches hold through both.
- Daily cap: add stitches
- Event cap: heat is enough
- Gift cap: use thread
- Team set: use a hat press
Two sibling guides cover the basics. Read our general iron-on guide for heat and time by fabric. Read our full stitching guide for stitch types.
CROWN TYPES
Structured or Unstructured Crown: What Your Cap Is Built From
A crown is the dome of the cap. Its build decides how a patch behaves. Check yours before you plan anything.
| Crown | Typical build | Patch effect |
|---|---|---|
| Structured | Stiff buckram lining | Presses flat, holds shape |
| Unstructured | Soft, no stiff lining | Flexes, can pucker |
| Mesh back | Foam front, mesh rear | Front panel only |
| Knit beanie | Stretch knit | Stitch loosely |
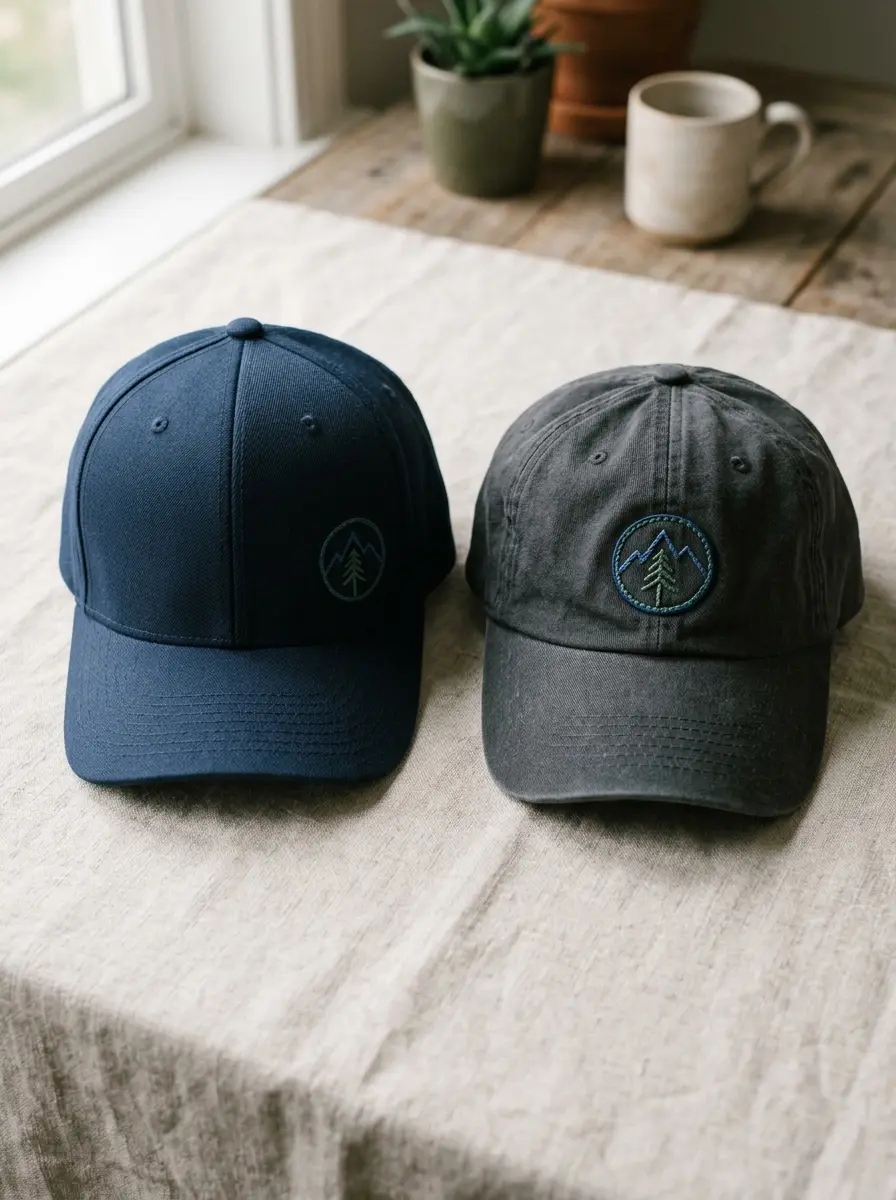
Pros
- Structured fronts press flat
- Stiff buckram resists puckering
- Position stays put
Limits
- Curve limits patch width
- Hard to reach inside
- Stiff panels hide seam ridges
Soft crowns flex under the iron. The patch sits flat but the cap does not. A patch on a hat with no lining needs support from inside.
- Front stands up on a table
- Front folds when you squeeze it
- Inside shows a stiff white lining
- Inside shows plain fabric only
- Bill holds a curve or lies flat
- Crown
- The dome that covers your head.
- Front panel
- The face of the cap. Your patch goes here.
- Buckram
- Stiff woven lining behind the front panels.
- Bill
- The brim at the front. Keep patches off it.
Five-panel and six-panel caps differ. A six-panel front has a center seam. A five-panel front is one smooth piece. The smooth front is easier to patch.
Weight matters on soft crowns. A heavy patch pulls the front down. The crown slumps forward over time. Keep the patch small on soft caps.
PLACEMENT
Curved Brim and Seam Lines: Where a Patch on a Hat Can Sit
The front panel is your safe zone. The bill and seams are not. Mark the spot before any heat or thread touches the cap.
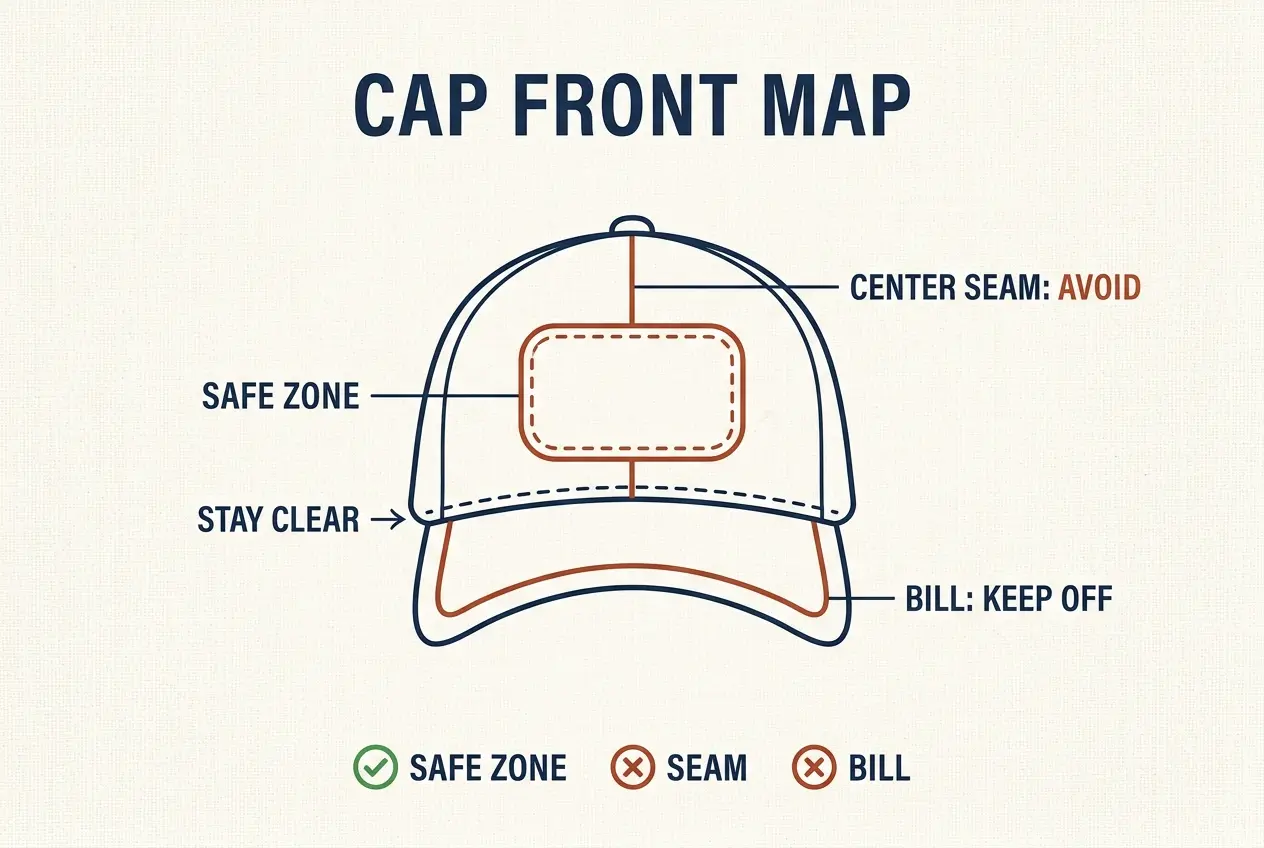
- Find the center seam with your finger.
- Mark the middle with chalk.
- Place the patch below the seam height of the crown.
- Check from the front and the side.
- Tape two tabs to hold it.
- Center seam ridge
- Bill stitch line
- Eyelets and vents
- Sweatband edge
- Logo embroidery
- Center seam
- Runs down the front on six-panel caps.
- Bill line
- Where the brim meets the crown. Thick with stitching.
- Eyelets
- Small vent holes near the top. Keep clear.
- Sweatband
- The inner band. Never stitch through it.
A cap front curves in two directions. It bows side to side and tilts back. A wide patch cannot lie flat on both. Narrow patches sit better.
Sizing by cap style lives in hat patch sizes by cap style. Here, only placement matters.
- Mark the center with chalk
- Keep one finger of space from the bill
- Place the patch slightly above the bill line
- Stand back and check the angle
Check the rear view too. A tall patch can look odd from the side. A low patch looks balanced from every angle.
IRON STEPS
Ironing Patches on Hats: Steps for a Curved Crown
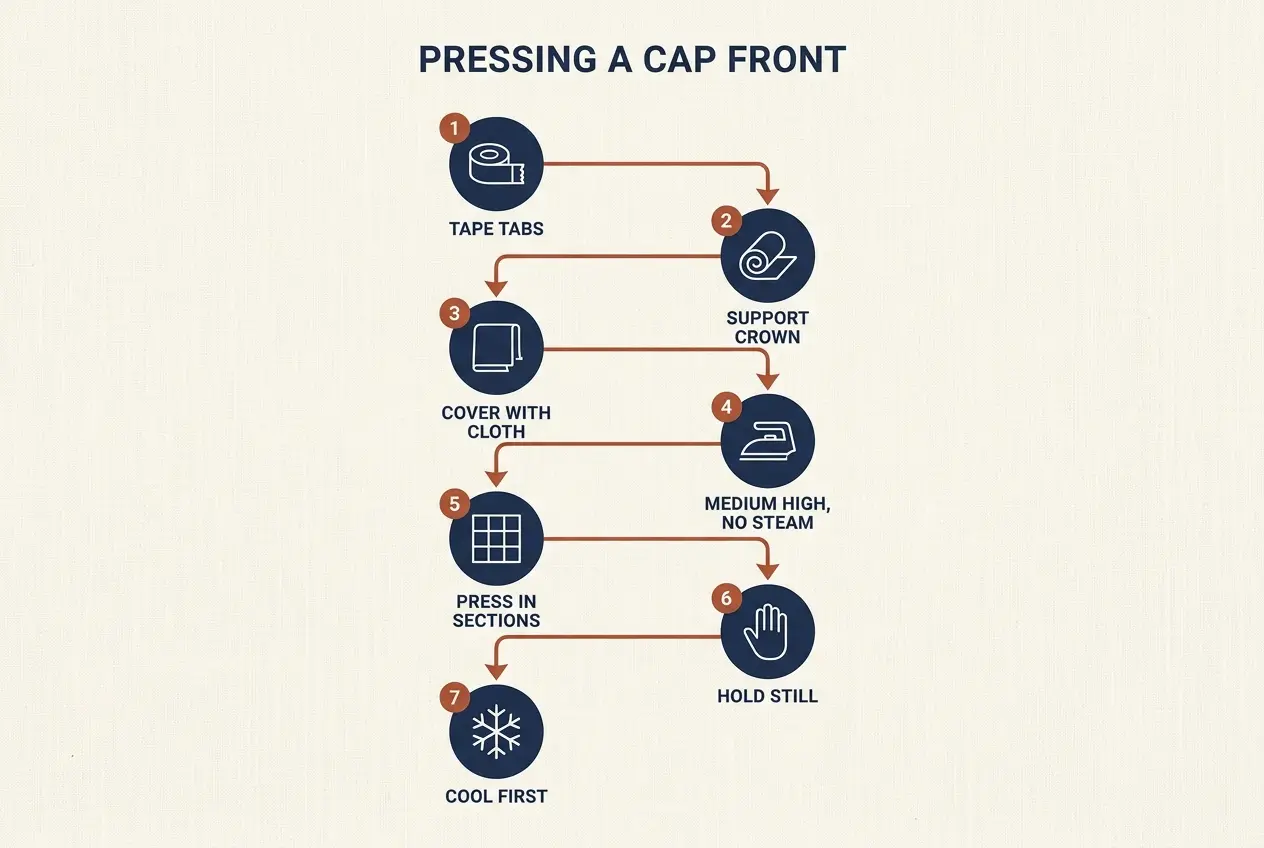
Ironing patches on hats works on cotton twill with a heat-seal backing. You press a flat tool onto a round shape. Press in small sections.
- Tape tabs
Tape the patch with two heat-safe tape tabs.
- Support the crown
Slide support inside the cap.
- Cover
Lay a thin cotton cloth over the patch.
- Set the iron
Use medium-high heat with no steam.
- Press in sections
Press the center first, then each edge.
- Hold
Hold firm pressure without sliding the iron.
- Cool
Let the cap cool before you move it.
- Household iron with steam off
- Thin cotton pressing cloth
- Rolled towel for support
- Heat-safe tape
- Chalk for marking
| Cloth | Use it? | Why |
|---|---|---|
| Thin cotton cloth | Yes | Spreads heat evenly |
| Parchment paper | Yes | Blocks thread snags |
| Terry towel | No | Leaves a texture |
| Bare iron | No | Burns thread |
Dark twill shows scorch fast. Embroidered thread can melt and shine. Keep the cloth on until the cap is cool.
- Test heat on a hidden spot
- Keep the iron flat and still
- Press the edges twice
- Skip circular rubbing
Cooling matters most. The adhesive sets as it cools. Moving the cap early breaks the bond. Wait until the patch feels cool to the touch.
- Do not flex the cap while warm
- Do not stack caps right away
- Hang the cap up to cool
- Wait for full cooling
- Press edges a second time
- Check each corner
Typically a press lasts about 15 to 45 seconds. Your patch maker sheet sets the real number. For heat by fabric, see our general iron-on guide.
Support the Crown From the Inside While You Press
A soft crown gives way under the iron. Fill the cap so the front stays firm.
- Roll a towel and tuck it in
- Use a pressing ham if you own one
- Stuff the crown with a folded cloth
- Rest the cap on a firm board
HEAT PRESS
Heat Press Patches for Hats: Hat Press, Flat Press or Household Iron
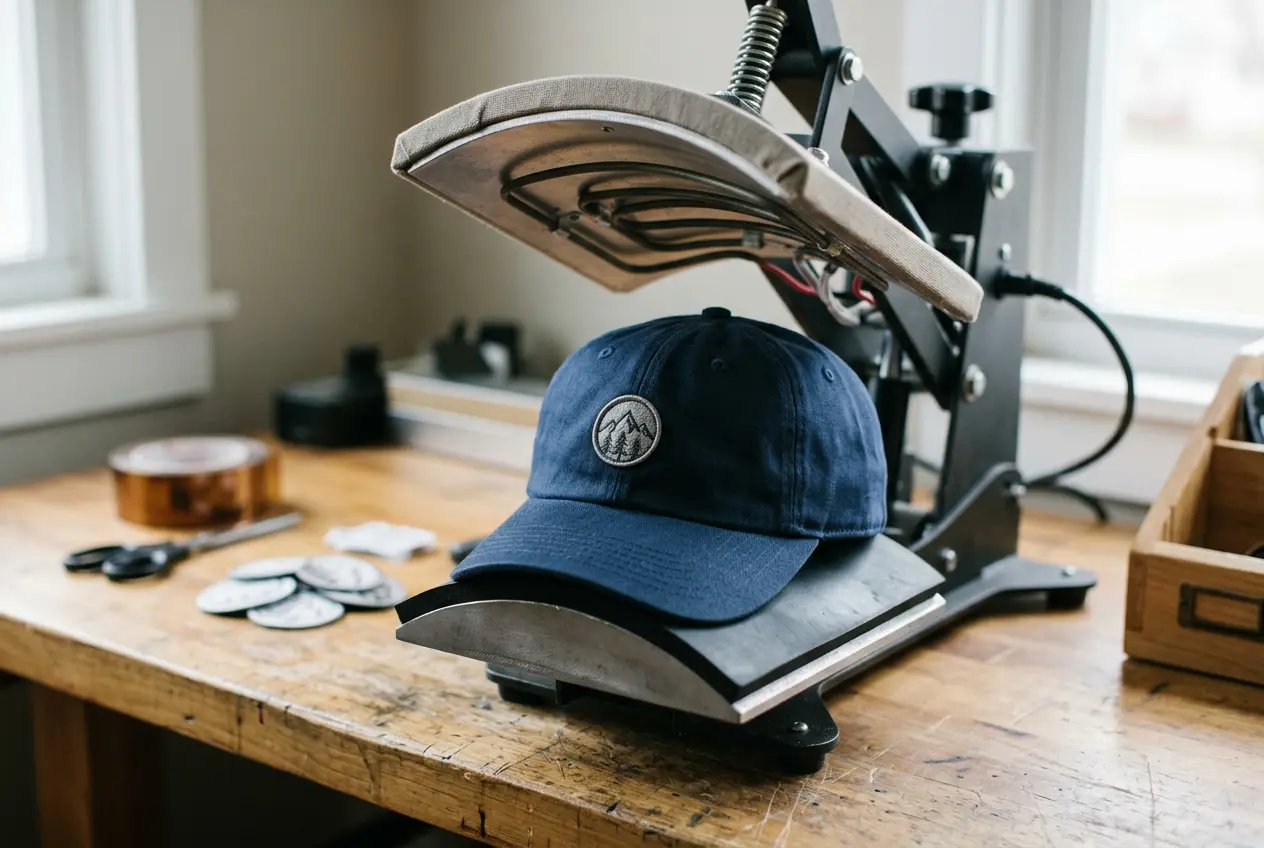
Some caps suit a machine better than an iron. To heat press patches for hats, you need a press made for caps. A hat press has a curved lower platen.
| Tool | Fit to crown | Best for |
|---|---|---|
| Hat press | Curved platen matches | Repeat caps, structured fronts |
| Flat clamshell press | Flat plate on curve | Flat panels only |
| Household iron | Small contact area | One or two caps |
- Platen
- The plate that carries the heat. A hat press has a curved one.
- Dwell time
- How long heat stays on the patch.
- Guard sheet
- A thin sheet that protects the patch face.
- Heat tape
- Tape that holds the patch while you load the cap.
- Tape the patch in place
- Load the cap, bill up
- Cover with a guard sheet
- Close and hold the full time
- Let it cool before lifting
A flat clamshell press works on cap fronts that lie nearly flat. Most caps do not. If yours curves, use a hat press or the iron method.
Pros
- Even pressure across the patch
- Repeatable time and heat
- Faster for many caps
Limits
- You need the machine
- Not for one-off home jobs
- Wrong settings can scorch
Heat Pressing Patches on Hats: Time, Temperature and Pressure
Settings change with the press and the backing. Suppliers typically list about 300 to 350 degrees F. Time often runs from 20 to 45 seconds.
Settings are not set in stone. Different patch backings need different heat. A woven patch and a thick embroidered one may not need the same time.
| Setting | Typical range | Check |
|---|---|---|
| Temperature | About 300 to 350 degrees F | Patch sheet |
| Time | 20 to 45 seconds | Patch sheet |
| Pressure | Medium | Press dial |
| Cooling | About 30 seconds | Before lifting |
| Check | Why |
|---|---|
| Backing type | Heat-seal or sew-only |
| Patch thickness | Thicker needs longer |
| Cap fabric | Polyester needs less heat |
| Press type | Hat press or flat |
Heat Transfer Patches for Hats: Which Backings Accept Heat
Heat transfer patches for hats carry a heat-seal layer on the back. Other backings need thread or a loop panel.
| Backing | Cap method |
|---|---|
| Heat-seal | Iron or hat press |
| Plain sew-on | Stitching |
| Hook-and-loop | Sewn loop panel |
| Adhesive | Light, short wear |
- Heat-seal suits cotton caps
- Sew-only needs a needle
- Hook-and-loop lets you swap
Backings are explained in our backing guide. Hook-and-loop sets are covered in hook-and-loop patches.
STITCHING
Sewing Patches on Hats: Stitches That Hold on a Cap Front
Thread holds on every cap. Stitching takes patience. Stitch through the front panel only.
- Pin or tape the patch in the safe zone.
- Thread a needle with strong polyester thread.
- Start from inside the crown and pull through.
- Whipstitch around the patch edge.
- Keep stitches small and even.
- Knot twice inside and trim the tail.
- Curved needle for tight crowns
- Polyester thread in a matching color
- Thimble for stiff buckram
- Small scissors
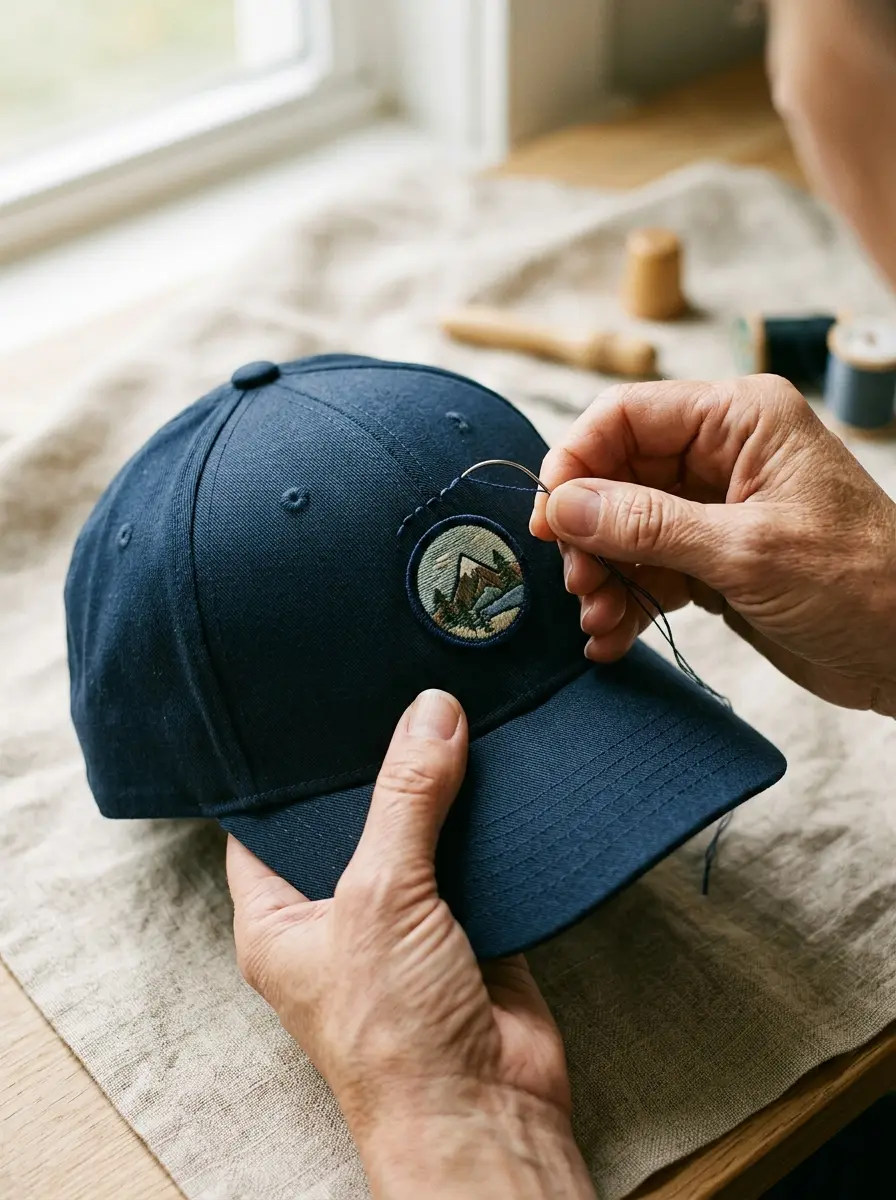
A closed crown is hard to reach. Reach in with two fingers. Use them to push the needle through. A thimble protects them.
- Pin from the outside, not the inside
- Stop pins from poking your forehead
- Cover your needle point when you rest
| Stitch | Where it helps | Look |
|---|---|---|
| Whipstitch | Patch edge | Visible, strong |
| Backstitch | Corners and curves | Tight, neat |
| Blind stitch | Visible fronts | Almost hidden |
Match the thread to the patch border. A matching color hides small stitches. A contrast color makes a style choice.
- Sew corners twice
- Keep stitches about the same size
- Pull thread snug, not tight
A patch on a hat can be sewn over a loop panel too. Stitch types are in our full stitching guide.
Beanies and Knit Caps: Stitch Through the Knit
Knit stretches. Tight thread puckers it.
- Stitch loosely with relaxed thread
- Pick a stretch-friendly thread
- Add a backing patch inside if thin
- Skip high heat on thin acrylic
A beanie cuff gives you a flat stretch of knit. Place the patch on the cuff, not the crown. The cuff is thicker and holds it better.
Stitching is slow but forgiving. You can pick out a stitch and redo it. A scorched front cannot be redone.
CAP BY CAP
Cap by Cap: Trucker, Dad Hat, Snapback, Bucket and Wool Cap
Each cap has its own weak point. Use this table when you hold the cap in your hand.
| Cap | Best method | Watch for |
|---|---|---|
| Trucker | Stitch the front | Mesh melts, foam warps |
| Dad hat | Iron with support | Puckering |
| Snapback | Hat press or stitch | Stiff, curved front |
| Bucket hat | Stitch | Soft folds |
| Wool flat cap | Stitch only | Scorching wool |
| Fitted cap | Hat press or stitch | Tight sizing |
- Test heat on a hidden spot
- Keep patches on solid panels
- Choose thread over heat when unsure
Leather fronts need special care. See leather cap patches for that case.
Stitch the front panel. The mesh rear stays untouched.
Iron with a towel inside. Press gently.
A hat press fits the stiff, curved front.
Stitch it. The soft fold needs thread.
Wool scorches. Use thread only.
A fitted cap has no adjuster. The patch must not stiffen the front too much. Keep it small and stitch loosely. Straw hats take thread only, never heat.
| Cap | Heat safe? | Thread safe? |
|---|---|---|
| Cotton twill | Yes, with cloth | Yes |
| Polyester | Low heat only | Yes |
| Mesh back | No | Front panel only |
| Wool | Not advised | Yes |
| Knit beanie | Not advised | Yes, loose |
Always test on the cap you own. Two caps with the same name can be built differently. A quick test costs a minute and saves the cap.
CAP FIXES
Fixes for Lifted Edges, Scorch Marks and Puckered Fronts
Cap fronts fail in their own ways. Match your symptom to the fix. Heat pressing patches on hats a second time can fix lifted corners.
| Symptom | Cause | Fix |
|---|---|---|
| Lifted corner | Short press time | Press again briefly |
| Puckered front | No crown support | Support, then restitch |
| Shiny scorch mark | Bare fabric under iron | Use cloth, lower heat |
| Warped bill | Heat too near the bill | Keep heat on the panel |
| Edge peels after sweat | Heat bond alone | Add small stitches |
- Mark the spot and test first
- Use a pressing cloth every time
- Add stitches to the edge corners
- Let the cap cool fully
Fix it early. A lifted corner grows if you leave it. Small stitches stop it from spreading.
- Warm gently
Place cloth over the lifted edge and press for a few seconds.
- Add stitches
Sew two small stitches at each corner.
- Cool and check
Let it cool. Tug the edge lightly.
| Prevent | Do this |
|---|---|
| Puckers | Support the crown |
| Scorching | Use a cloth |
| Lifted corners | Add stitches |
| Warped bill | Keep heat off it |
Most cap failures start before the patch goes on. Planning saves the cap. Mark, test and support first.
READY TO ORDER
Get a Free Quote on Patches Made for Your Cap
Upload Artwork
Send any common file format.
Approve Your Proof
Free digital proof within 24 hours.
We Ship Worldwide
Standard 10 to 14 business days. Rush in 5.
Send your artwork and tell us the cap style.
No minimum. Free proof in 24 hours. Ships to 50+ countries.
COMMON QUESTIONS
Questions About Putting Patches on Caps
Can you iron a patch onto a mesh trucker hat?
No. Mesh and foam can melt under heat. Keep heat on the solid front panel only. Or stitch the patch on, or sew a loop panel for hook-and-loop instead.
How do you press a patch on a cap without flattening the crown?
Slide a rolled towel inside the cap first. Press only the patch area. Lift the iron straight up when done. The towel keeps the crown round while the adhesive sets.
Can a household iron press a curved cap front?
Yes, with support behind the panel. Press the patch in small sections, center first. The iron has a small contact area. A hat press suits curves better but needs a machine.
Does a hat press work better than an iron on a cap?
Usually yes. The curved platen matches the crown, so pressure stays even across the patch. An iron works for a few caps. Add careful support inside the crown.
What settings should a hat press use for a patch?
Settings vary by backing and press. Suppliers typically list about 300 to 350 degrees F. Time runs 20 to 45 seconds at medium pressure. Always follow your patch maker sheet over any general range.
Should you sew a patch through the sweatband?
No. Stitch through the front panel only. Thread across the inner band feels stiff and can rub your forehead. Start each stitch from inside the crown and stop before the band.
Why is machine stitching on a closed cap crown so hard?
The crown is a closed dome. A machine needs flat fabric under the needle. The dome gets in the way. Hand stitching with a curved needle is the practical choice for finished caps.
Will low heat flatten the knit on a thin beanie?
It can. Thin acrylic may flatten or melt under high heat. Stitch the patch loosely, or sew on a loop panel instead. Test any heat on a hidden spot of the cuff first.
Which caps are poor choices for a patch?
Thin mesh fronts, stretchy performance fabric and heavily curved foam fronts are risky. Heat can melt them and thread can pucker them. Choose stitching or hook-and-loop on those caps, and test first.
Will a patch change how a cap fits?
A stiff patch can reduce flex at the front. Stay on the front panel and keep stitches relaxed so the cap still bends. A smaller patch changes the fit less than a wide one.
Can I add a patch over embroidery already on the cap?
Often yes, if the patch covers it fully and the old stitching lies flat. Heat can flatten raised thread underneath. Test a small spot first, or stitch the patch to avoid heat.
How do I keep a patch centered on a curved cap front?
Mark the center seam with chalk. Tape two tabs to hold the patch. Check from the front and the side. Then use a mirror. Do this before heat or thread.
KEEP EXPLORING