Custom Hat Patches for Caps and Beanies
Made to order for your cap, from one patch up.
We make custom patches for caps from your artwork. Each one is sized for your crown. You get a free proof in 24 hours.
PATCH TYPES
Which Custom Hat Patches Work Best on Each Cap?
Custom embroidered hat patches suit most caps. Thread gives a raised, textured face. Three other types solve specific problems, so start with the table.
| Type | Look | Best on | Watch for |
|---|---|---|---|
| Embroidered | Raised thread texture | Baseball caps, snapbacks | Very fine text |
| 3D puff | Foam lifts the stitches | Structured front panels | Thin lines vanish |
| PVC | Smooth, rubbery, waterproof | Outdoor and bucket hats | Thick, adds weight |
| Woven | Flat, tight, fine detail | Dad hats, small logos | Less texture |
Every type is made to order from your artwork. There is no minimum. Your free proof shows colors and edges before production starts.
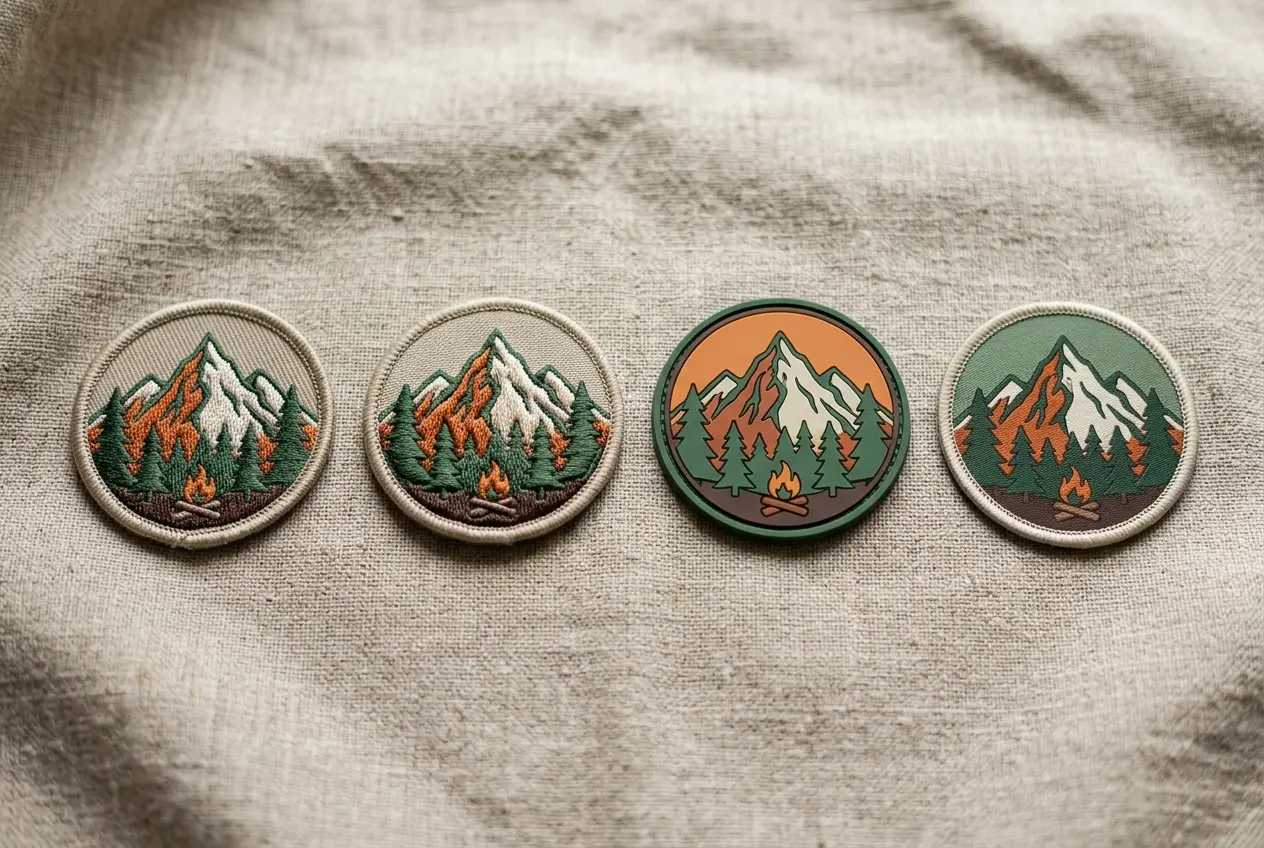
- Satin stitch
- Dense parallel thread. It gives a smooth, shiny fill.
- Fill stitch
- Rows of thread that cover larger areas.
- Merrowed border
- A wrapped thread edge. It seals the patch and frames the design.
- Twill base
- The polyester fabric under the stitches.
Embroidered fits most logos. It looks classic and wears well.
PVC sheds water and wipes clean. It suits work caps.
Woven stays flat and light. The crown keeps its curve.
3D puff stands out. Use one bold shape.
Still unsure? Send your cap type and artwork. Your proof shows how the patch will look.
Custom Embroidered Hat Patches: Classic and Textured
Satin and fill stitches build the design in polyester thread. A polyester twill base holds the shape. Your proof shows Pantone-matched colors.
A cap panel is read at a glance. Fewer, thicker details look best there. Save the tiny print for a bigger garment.
- Best for bold logos and block letters
- Raised texture reads well from a distance
- Text under 4 mm typically gets muddy
3D Puff Embroidered Patches: Raised and Bold
Foam sits under the stitches. The design stands up off the cap. Keep shapes thick, because thin lines disappear.
Puff suits one strong word or a simple icon. It catches light and shadow. That makes a plain logo look bigger.
- Strong on stiff, structured front panels
- Needs thick letters and big shapes
- Adds height you can feel
PVC Hat Patches: Waterproof and Tactical
PVC is a molded rubber patch. It shrugs off water and sweat. It is thick, so it looks larger than a stitched patch.
Choose it for rain, boats and job sites. Edges stay sharp and colors stay flat. It adds more weight than thread does.
- Suits outdoor, work and tactical caps
- Wipes clean with a damp cloth
- Holds sharp edges and flat color
Woven Hat Patches: Fine Detail at Small Sizes
Woven patches use fine thread in a tight weave. Small text stays readable. The surface is flat, so it sits close to the crown.
That flat build helps on soft caps. It adds little weight. The crown keeps its curve.
- Best for small logos and thin lines
- Flat finish suits dad hats
- Less texture than embroidery
Want a leather look? Read about leather hat patches. Compare every type on the type comparison page.
Pros
- Embroidered: raised texture and depth
- Embroidered: reads from a distance
- Woven: crisp small text
- Woven: flat and light
Limits
- Embroidered: fine text can blur
- Embroidered: more weight
- Woven: less texture
- Woven: flat look
Match brand colors by Pantone code. Your proof shows the match before production starts.
SIZE GUIDE
Custom Cap Patches: Size Guide by Hat Type
Size depends on the cap, not the logo. These ranges are typical for each hat type. Send your cap type with your artwork. Your proof confirms the final size.
| Hat type | Typical width | Fit note |
|---|---|---|
| Baseball cap | 2.25 to 3 inches | Sits on the front panel |
| Snapback | 2.5 to 3 inches | Flat panel, easy to center |
| Trucker hat | 2.5 to 3.5 inches | Tall front takes more |
| Dad hat | Use the baseball range | Soft crown, keep it light |
| Beanie | 2 to 2.75 inches | Small and light for knit |
| Cowboy hat | Confirmed on your proof | Small and flat |
| Youth cap | 70 to 80% of adult size | Scale the artwork down |
Width is only half the story. Height matters just as much. Panel height changes from brand to brand.
- Measure the panel, not the whole cap
- Measure width at the widest point
- Measure height from the seam to the top
Baseball Caps and Snapbacks
A baseball cap front is wide and fairly flat. A typical patch runs 2.25 to 3 inches wide. Snapbacks sit at 2.5 to 3 inches.
- Center it above the bill
- Match the width to the panel
- Leave a margin around the edge
Snapbacks usually have a flat front panel. That makes centering simple. Check the panel height before you pick a width.
Custom Patch Trucker Hats: Sizing for a Tall Structured Front
A trucker front is tall and stiff. A typical patch is 2.5 to 3.5 inches wide. The mesh back never carries a patch.
Foam fronts hold a flat patch well. Check the front panel height first. Then pick a width that leaves a clear border.
- Check the foam front height
- Leave a clear border around the patch
- Keep the mesh free
Dad Hats and Unstructured Caps
Dad hats have a soft, low crown. Use the baseball range or go a little smaller. A heavy patch pulls the front down.
- Pick woven or light embroidery
- Skip thick puff on soft crowns
- Stitch the full edge
Washed cotton caps fold at the patch edge. Stitch every inch of the border. Loose corners curl first.
Custom Beanie Patches: Smaller Sizes for Stretch Fabric
Knit stretches, and a big patch does not. A typical beanie patch is 2 to 2.75 inches wide. Keep the design simple.
Place it on the cuff or just above the fold. Stretch the knit gently as you check the fit.
- Pick a light patch
- Sew it with a soft thread
- Avoid heat on knit
Custom Cowboy Hat Patches: Small, Flat and Stitched
Felt and straw carry little weight. Choose a small, flat patch. Stitch it on, because heat can harm felt and straw.
Youth caps are smaller overall. Scale the artwork to about 70 to 80% of the adult size.
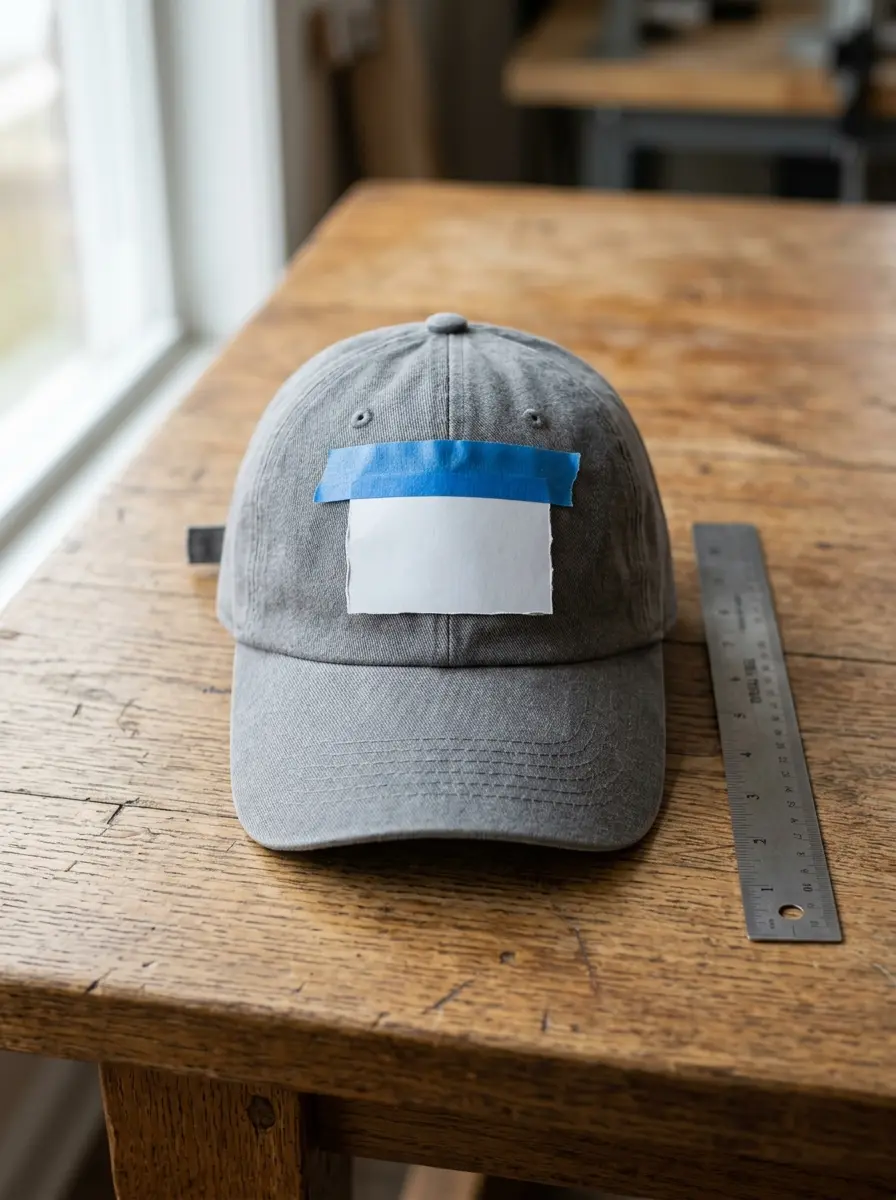
- Cut a paper template
Cut paper to the patch size and shape.
- Tape it on the cap
Use painter's tape so nothing marks the fabric.
- Step back
Check the look from arm's length.
- Adjust and send
Note the final width with your artwork.
- Choose a small, flat patch
- Stitch it, never press it
- Test on a hidden spot first
CROWN TYPE
Structured or Unstructured Crown: How It Changes Your Patch
The crown decides what works. A stiff front takes bigger patches and more methods. A trucker front is the stiffest of all. So custom patch trucker hats take larger, firmer patches.
| Crown | Front panel | Best patch | Method |
|---|---|---|---|
| Structured | Stiff, holds shape | Any type, larger sizes | Stitch or press |
| Unstructured | Soft, folds easily | Light woven or embroidered | Stitch |
| Beanie | Stretch knit | Small and light | Stitch |
- Structured crown
- A stiff front, often lined with buckram. It stands upright.
- Unstructured crown
- No stiff lining. The front folds and slouches.
- Six-panel cap
- Six fabric panels meet at a center seam on the front.
- Five-panel cap
- A single front panel, so no seam splits the patch.
| Patch type | Structured | Soft crown |
|---|---|---|
| Embroidered | Great | Keep it small |
| 3D puff | Great | Usually too heavy |
| PVC | Good | Often too stiff |
| Woven | Good | Great |
Most caps curve from front to side. A wide patch must bend with that curve. On a soft crown, a wide patch wrinkles.
Stiffness changes three things. It changes the size you can use. It changes the methods that work. It also changes where the patch is safe.
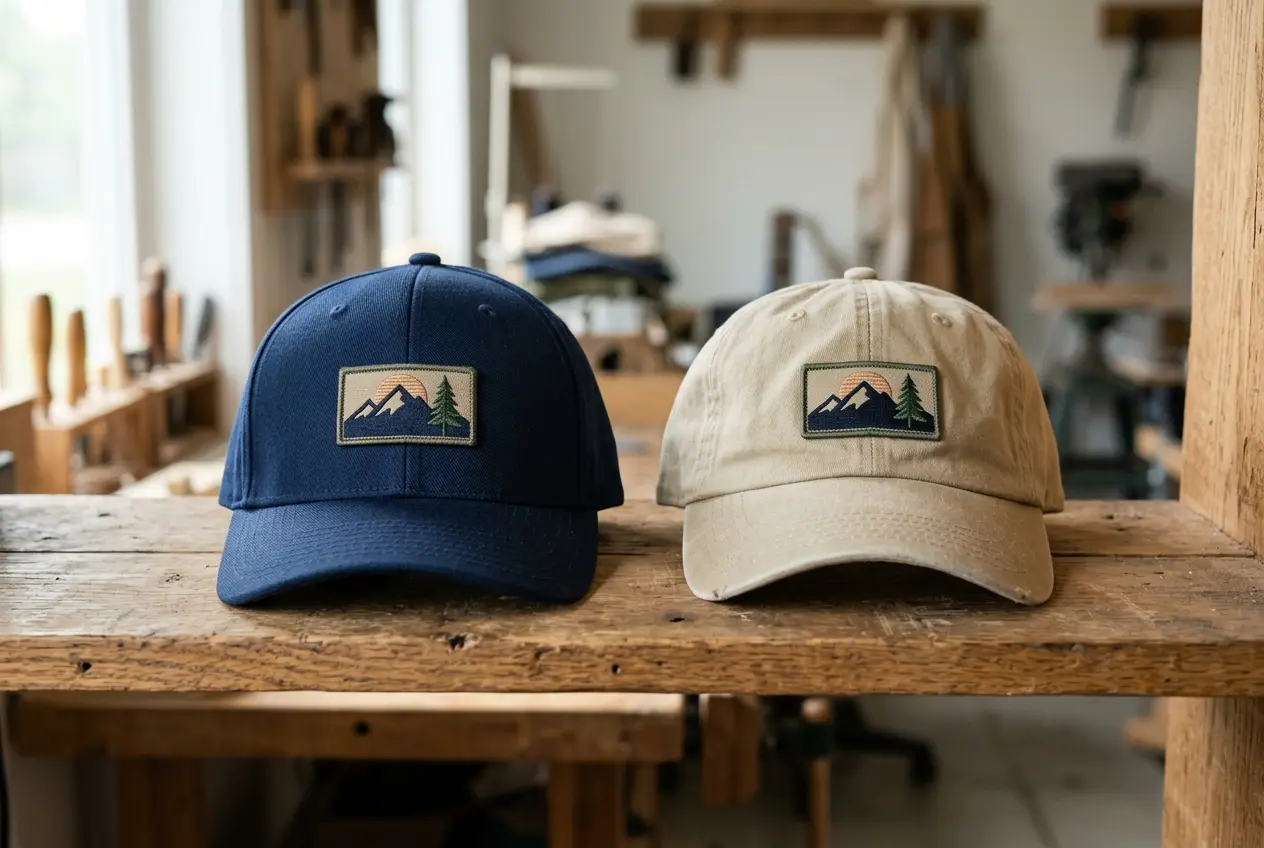
- Structured crowns hold a flat patch best
- Soft crowns wrinkle under heavy patches
- Six-panel caps have a center seam
- Mesh backs cannot take a patch
- Stretch knit needs a light patch
- What is the crown made of
- Does the front fold or stand
- Will the cap be washed often
Answer those three first. They narrow the patch type fast. Then pick the size from the guide above.
ATTACHMENT
How Custom Patches for Hats Go On: Stitching, Hat Press or Adhesive
Three methods put a patch on a cap. Stitching is the most secure. A hat press and adhesive are faster.
| Method | Best backing | Durability | Skill |
|---|---|---|---|
| Stitching | Sew-on | Highest | Basic sewing |
| Hat press | Heat-seal | Good on flat panels | Needs a press |
| Adhesive | Adhesive backing | Lowest | None |
Stitch it. Thread outlasts glue and heat.
Adhesive is fine. Add a few stitches for safety.
A hat press works well here.
Sew it. Skip heat on knit.
Your backing decides the method. Sew-on backing suits thread. Heat-seal backing suits a press. Ask for the backing that matches your plan.
When Stitching Wins on a Cap
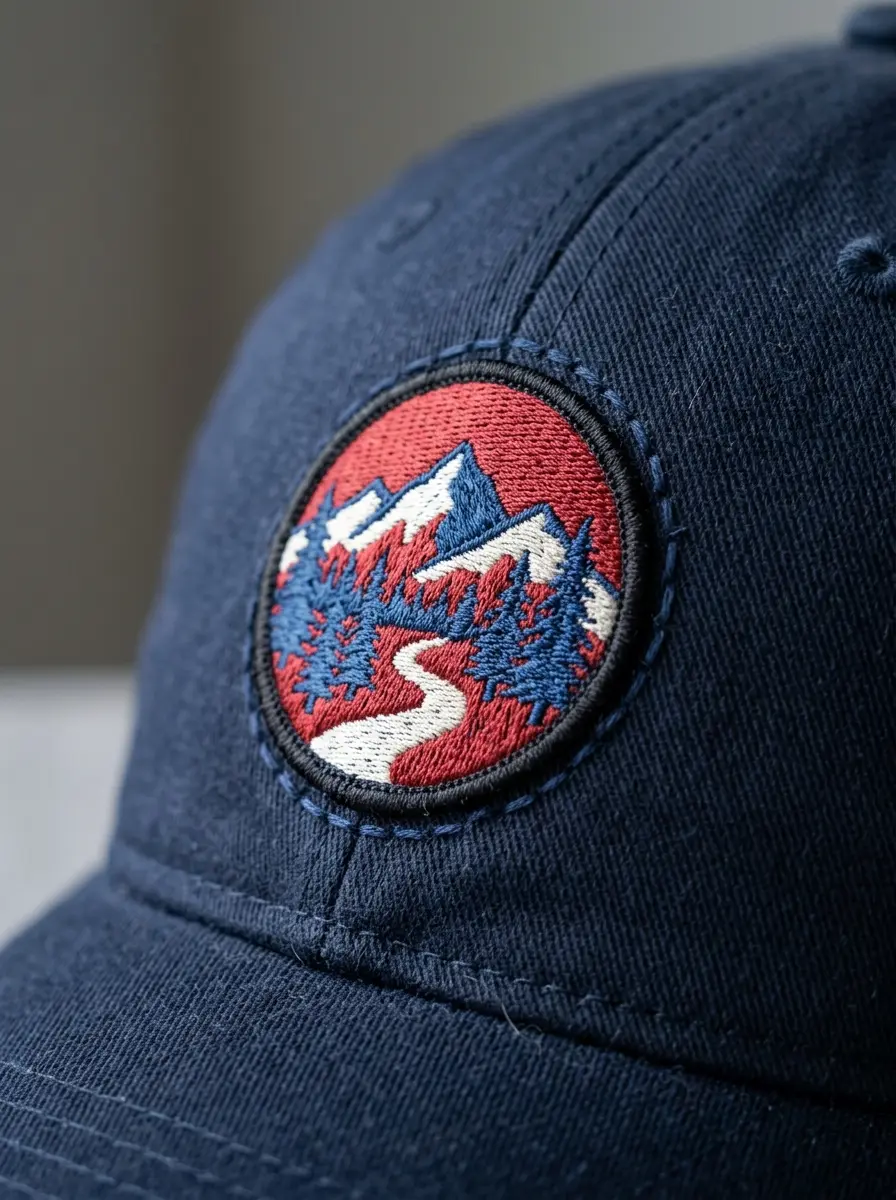
Thread holds on every cap type. It also suits curved panels and soft crowns. Keep stitches about 1/8 inch from the patch edge.
- Pin the patch to the front panel.
- Backstitch around the edge by hand.
- Knot the thread inside the crown.
- Use thread that matches the border
- Sew through the cap fabric only
- Keep stitches small and even
Need every step? Read the sewing guide.
Match the thread color to the border. Then the stitches almost vanish. A neat edge looks finished.
When a Hat Press Makes Sense
A hat press has a curved platen. It suits patches with heat-seal backing. Test your cap fabric first, because heat limits vary.
- Set the cap on the curved platen.
- Lay a pressing cloth over the patch.
- Press, then let it cool.
- Best for flat, structured front panels
- Poor fit for stretch knit
- Pair it with a stitched edge for hard use
Heat settings live in the iron-on guide.
Heat can shine or flatten thread. Keep a cloth between the press and the patch. Never skip a test on spare fabric.
When Adhesive Is Enough
Fabric adhesive suits light use. It is the weakest hold. Use it for a costume or a single event.
- Clean and dry the panel.
- Press the patch flat.
- Stitch the edge on curved panels.
Pros
- No needle or press needed
- Quick for a one-time event
- Easy to line up
Limits
- Lifts with sweat and flex
- Weakest hold of the three
- Hard to reposition
- Is the panel flat enough for a press
- Does the backing match the method
- Will the cap see daily wear
- Is the fabric heat safe
| Cap fabric | Typical method |
|---|---|
| Cotton twill | Stitch or press |
| Polyester | Stitch, test heat first |
| Mesh | Do not patch it |
| Wool or felt | Stitch only |
Fabric limits beat preference. Check the label inside the cap. When in doubt, stitch.
PLACEMENT
Where Custom Cap Patches Sit: Front Panel, Side or Back Strap
Placement shapes the look. Most buyers choose the front panel. Custom patches for hats also work on the side or back strap.
| Spot | Typical position | Best for |
|---|---|---|
| Front panel | 1/2 to 3/4 inch above bill seam | Main logo |
| Left or right side | Centered, clear of seams | Small marks |
| Back strap | Above the adjuster | Tiny logos |
| Beanie | 1 to 2 inches above the fold | Cuffed knits |
- Front panel
- The default spot. It faces everyone you meet.
- Side panel
- A quiet spot for a small mark or a year.
- Back strap
- Room for a tiny logo above the adjuster.
- Beanie cuff
- Sits low and stays visible when folded.
Side and back spots work for small marks. A year, a crest or a tiny logo fits well. Keep these away from seams.
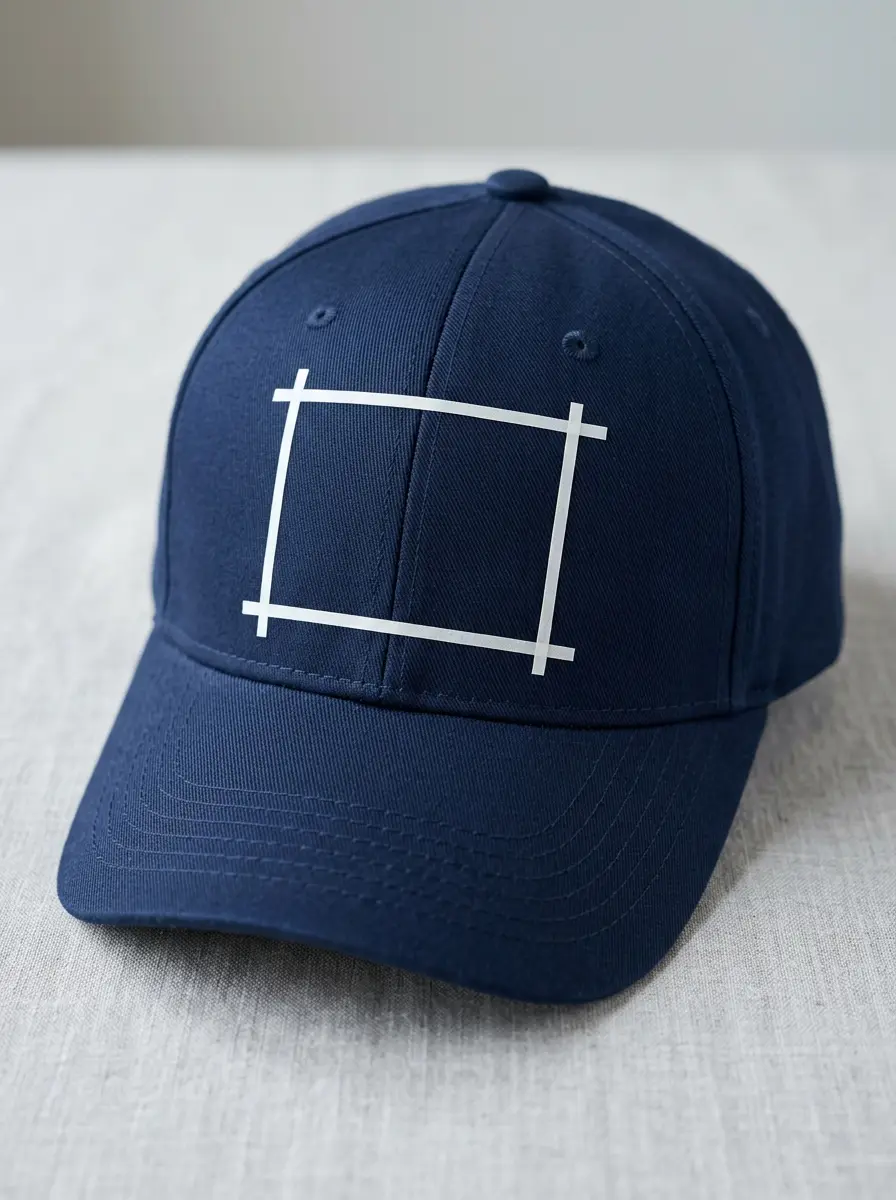
Use this quick check before you stitch. It takes a minute. It saves a crooked patch.
- Find the center of the front panel.
- Mark it with a pin.
- Set the patch a half inch above the bill seam.
- Check it from arm's length.
- Keep clear of seams
- Match the patch curve to the crown
- Use one patch per panel
- Test with painter's tape first
Other garments follow different rules. See the placement guide.
Most placement mistakes are simple. They are easy to avoid with a template.
- Placing the patch too close to the bill
- Letting a seam cut through the design
- Using a patch too wide for the panel
- Skipping a center mark
Beanies fold at the cuff. Put the patch where the fold will not hide it. Fold the beanie and check the look.
ARTWORK
Artwork Rules for Small Hat Patches: Text Height, Line Weight and Colours
Custom patches for caps leave little room for error. Thin lines fill in with thread. Bold shapes win.
Custom embroidery patches for hats have stitch limits too. Each stitch has width. Two lines too close will blur into one.
- Keep text taller than 4 mm, typically
- Choose bold, simple letters
- Use strokes thick enough to stitch
- Limit the number of colors
- Leave space between shapes
- Skip gradients and use flat colors
- Show the design at actual size
- Text height
- How tall the letters are. Small caps patches need taller letters.
- Line weight
- How thick each stroke is. Thin strokes fill in.
- Color count
- How many thread colors the design uses.
- Vector file
- Art built from shapes. It scales without blur.
| Format | Type | Notes |
|---|---|---|
| AI, EPS, PDF | Vector | Preferred |
| SVG | Vector | Accepted |
| PNG, JPG, BMP, TIF, PSD | Raster | Use high resolution |
Your free proof is the final check. Study the text and thin lines. Ask for changes until it looks right. Revisions are free and unlimited.
No artwork yet? Start on the patch design page.
- Set the size
Resize the art to the real patch width.
- Check the text
Make sure every letter stays readable.
- Merge colors
Combine shades that look alike.
- Export
Save as AI, EPS or PDF if you can.
Think of the patch as a small sign. It must read in a second. Cut everything that does not help.
PRICING
What Drives the Price of Custom Hat Patches
Four things set the price. Those are size, type, stitch count and quantity. Bigger patches use more thread and material.
| Driver | Effect | Why |
|---|---|---|
| Size | Larger costs more | More thread or material |
| Type | Varies by build | Puff and PVC differ |
| Stitch count | Dense art costs more | More machine time |
| Quantity | Each patch costs less | Setup spreads out |
| Art style | Stitch load |
|---|---|
| Bold block letters | Medium |
| Fine script | High |
| Open outline icon | Low |
| Solid filled crest | High |
A solid block of color takes many stitches. Open lettering takes fewer. Simple art often costs less than a dense crest.
- Pick a smaller size if the art allows
- Reduce the number of colors
- Order more patches at once
Full rates are on the pricing page.
Shipping is duty-free worldwide. Rush orders ship in 5 business days from proof approval.
PATCH ONLY
A Custom Cap Patch Is the Patch Only: What Your Hat Shop Still Needs
We make the patch. We do not sell finished hats. You bring the cap, or a decorator does.
| Item | Who provides it |
|---|---|
| The patch | Made for you here |
| The cap | You or a hat shop |
| Attaching the patch | You or a decorator |
Give your decorator a clear brief. It saves back and forth. It also avoids a wrong placement.
- Cap style and crown type
- Patch size and shape
- Patch type and backing
- Placement above the bill
- Number of caps
- Stitching or press method
- Ask if they sew supplied patches
- Ask the price per cap
- Ask how long they need
Place the patch order first. Then pick your decorator. That way you know the exact size before you book the work.
- Confirm how many caps need patches
- Confirm who supplies the caps
- Confirm the placement offset
CAP CARE
Keeping a Patched Cap Clean: Sweat, Sun and Washing
Caps take sweat and sun. Light care keeps a patch looking sharp. Gentle habits matter more than strong soap.
| Do | Avoid |
|---|---|
| Spot clean by hand | Hot machine washes |
| Air dry the cap | Tumble drying |
| Rinse sweat after wear | Letting salt dry in |
| Store out of direct sun | Leaving it on a dash |
| Check stitches often | Pulling loose threads |
Sweat leaves salt on thread and fabric. Rinse it out soon. Sun can fade dark colors over time.
- Use cool water and mild soap
- Reshape the crown while damp
- Re-stitch loose edges early
More tips are in the patch care guide.
- Brush off dust
Use a soft brush on the patch face.
- Spot clean
Dab with cool water and mild soap.
- Rinse and blot
Remove soap with a damp cloth.
- Air dry
Reshape the crown and let it dry flat.
Wash only when needed. Each wash wears thread a little. Spot cleaning is often enough.
ORDER STEPS
From Hat Patch Design to Proof in 24 Hours
Custom made patches for hats follow four steps. Send your cap type and panel size with the artwork. That lets us size the patch right.
- Send artwork
Upload AI, EPS or PDF. Add your cap type.
- Approve your proof
Get a free Pantone-matched digital proof in 24 hours. Revisions are free and unlimited.
- We make the patches
Production takes 10 to 14 business days.
- Receive them
Rush takes 5 business days from proof approval. Shipping is duty-free worldwide.
- Cap type and crown style
- Panel width and height
- Placement on the cap
- Backing choice
- Number of patches
Rush is optional. It helps when a date is fixed. Share your date with the artwork.
READY TO ORDER
Custom Patch Hats No Minimum: Order Patches for One Cap or Ten Thousand
Upload Artwork
Send any common file format.
Approve Your Proof
Free digital proof within 24 hours.
We Ship Worldwide
Standard 10 to 14 business days. Rush in 5.
Upload your artwork and get a free proof in 24 hours.
No minimum. Free proof in 24 hours. Ships to 50+ countries.
COMMON QUESTIONS
Hat Patch Questions, Answered
Can you put patches on a hat?
Yes. Pick a patch type and size that suit your crown. Then stitch it, press it with heat or use adhesive. Stitching lasts longest. Check the crown first, because a soft crown limits what you can use.
How do you attach patches to hats without sewing?
Use heat-seal backing with a hat press, or fabric adhesive. Both work without a needle. On curved panels, add a stitch around the edge. That gives a firmer hold.
What is the best glue to put a patch on a hat?
Use a fabric-safe adhesive made for textiles. Avoid craft glue that dries hard. Check the label for caps. Glue is weaker than thread. Stitch the edge if the hat sees heavy use or washing.
How much does it cost to sew a patch on a hat?
Sewing prices vary by shop. We make the patch and do not sew caps. Our patch prices are public. A single patch is $8-15, and 500+ embroidered start from $0.30 each.
Does a bigger hat patch cost more than a small one?
Usually yes. A larger patch uses more thread and material, and dense art adds stitches. A single patch runs $8-15, and prices drop with quantity. See the price drivers table above. Simple art often costs less than dense art.
Can I order personalized patches for hats from my own design?
Yes. Upload your artwork as AI, EPS or PDF. PNG, JPG, SVG, PSD, BMP and TIF work too. You get a free Pantone-matched digital proof in 24 hours.
What is the most durable material for hat patches?
Embroidered and woven patches both sew on well. PVC resists water and sweat. No single type wins for every cap. Match the type to how you wear the hat. Think about washing too.
Do dry cleaners, Lids or craft stores sew patches onto hats?
Some do and some do not. Policies vary by shop. Call first. Ask if they sew supplied patches. Ask what they charge per cap.
What are hats with patches called?
People say patch hats, leather patch hats or trucker patch hats. We make the patch only. Your cap supplier or decorator provides the hat.
What are the best hat patches for a custom hat?
Match the type to the hat. Embroidered gives texture. Woven gives fine detail. PVC handles wet use. Pick the size from the guide above. Share your cap type with the artwork.
How far above the bill should a hat patch sit?
A typical placement is 1/2 to 3/4 inch above the bill seam. Center the patch on the front panel. Check it from arm's length before you stitch.
Can I put a patch on a beanie?
Yes. Choose a smaller, lighter patch. Sew it on, because heat and stretch knit do not mix well. Place it 1 to 2 inches above the fold.
Does a patch change how a cap keeps its shape?
It can. A stiff backing can flatten a curve. A soft backing follows the crown. Pick a light patch for soft caps. See backing options.
KEEP EXPLORING