Custom Embroidered Patches: Any Design and Any Quantity
Stitched on polyester twill from your artwork, shipped duty-free.
We stitch custom embroidered badges from your artwork on polyester twill. Free proof in 24 hours, no minimum, duty-free shipping worldwide.
THE BUILD
Inside a Custom Embroidered Patch: Twill, Thread and Stitch File
A patch is a small stack of parts. Twill forms the base. Thread forms the picture.
A border seals the edge. A backing sits behind. Machines sew the thread straight into the twill. That is why the surface feels raised under your thumb.
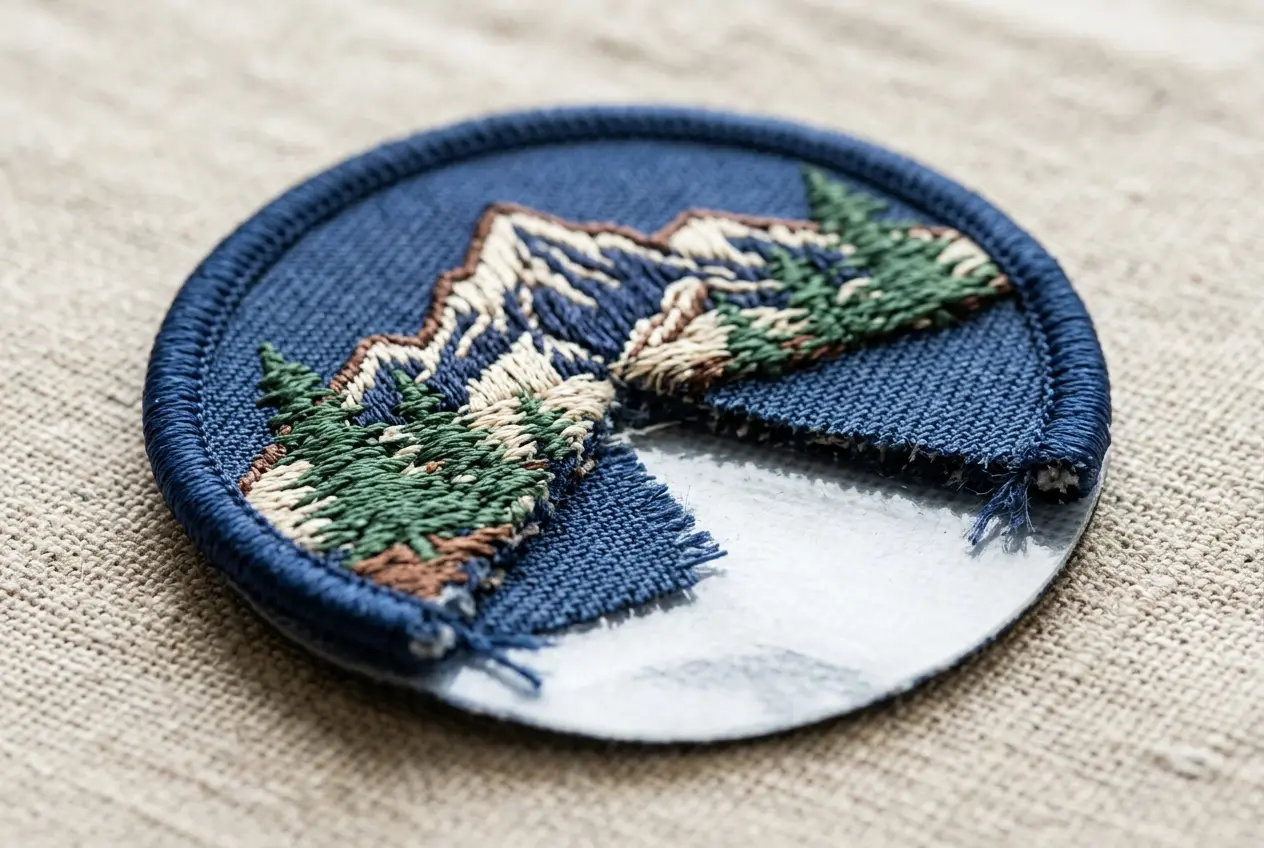
- Twill
- A woven polyester base. It holds the stitches in place and keeps the shape flat.
- Thread
- Polyester thread, matched to Pantone colors. It carries every line of your design.
- Stitch file
- A set of machine instructions. It tells each needle where to go.
- Border
- A thread wrap or cut edge. It frames the design and seals the twill.
- Backing
- The layer behind the patch. It decides how the patch attaches.
| Layer | Material | Job |
|---|---|---|
| Top | Polyester thread | Draws your design |
| Middle | Polyester twill | Holds every stitch |
| Edge | Border thread or cut edge | Seals the patch |
| Bottom | Backing | Attaches to garment |
Custom Patch Embroidery: From Vector Artwork to Stitch File
A machine cannot read a logo file. It reads a stitch file. A digitizer builds that file from your artwork. Plain shapes digitize best.
- Artwork
You send AI, EPS or PDF art. We check the shapes, colors and size.
- Digitize
Each shape becomes a set of stitch paths. The digitizer picks a stitch type for each one.
- Stitch path
We set the sewing order. Good order avoids gaps and puckering.
- Thread pick
Each color is matched to a Pantone chart. The proof lists every thread.
- Sew
Industrial machines stitch the twill. Many patches run at once.
- Trim
Loose threads are cut. The border is finished and the backing is added.
- Which stitch type fits each shape
- Which direction the stitches run
- Which shape sews first
- How much underlay each area needs
- How much extra width each shape gets
- Underlay
- Light stitches sewn first. They steady the twill and lift the top thread.
- Pull compensation
- Extra width added to a shape. Stitches pull the twill inward, so shapes need room.
- Stitch count
- The total number of stitches in a design. Dense art means a higher count and a heavier patch.
Digitizing is a skill. Two files of one logo can stitch very differently. A good digitizer reads each shape and picks the right stitch.
The free proof shows the result before any thread moves. You can change it as often as you like.
Polyester Twill and Pantone-Matched Thread
Twill gives the patch a firm, flat base. Polyester thread gives it color that holds. Sources such as Wikipedia describe polyester blend threads as colorfast.
Twill is a weave with a diagonal rib. It is tight and stable, so stitches do not sink in. Polyester thread is smooth and strong. A Pantone chart keeps each color on target.
| Part | What we use | Why it matters |
|---|---|---|
| Base | Polyester twill | Firm, flat, stable |
| Thread | Polyester thread | Resists fading |
| Color system | Pantone matched | Colors match your brand |
| Edge | Merrowed or hot-cut | Seals the border |
| Backing | Sew-on, iron-on, velcro, adhesive | Fits your garment |
| Proof | Free, within 24 hours | You approve first |
| Weight | Rises with coverage | Choose by garment |
| Revisions | Unlimited and free | Change until it fits |
Thread color is the main choice you make. We match each one to your Pantone code. The proof lists every thread so you can check.
- Polyester thread typically resists fading
- Twill shows through at 50% coverage
- Heavier coverage adds a raised feel
- Your proof lists every thread color
- Dark twill hides small gaps in stitching
- Light twill makes thin lines look sharper
Satin, Fill and Run Stitches: What Each One Does
Three stitch types do most of the work. Each suits a different shape. A good digitizer mixes all three in one patch.
| Stitch | Best for | Look | Watch out |
|---|---|---|---|
| Satin | Lettering, narrow shapes | Smooth and shiny | Wide areas look loose |
| Fill | Large solid areas | Textured and even | Adds weight and stiffness |
| Run | Fine outlines, small details | Thin single line | Easy to lose in busy art |
- Satin stitch lays thread side to side
- Fill stitch packs rows of short stitches
- Run stitch travels in one line
- Each type pulls the twill a little
| Logo part | Usual stitch | Why |
|---|---|---|
| Letter stems | Satin | Smooth, even lines |
| Big background block | Fill | Covers area evenly |
| Outline around a shape | Run or satin | Defines the edge |
| Small icon detail | Run | Fits tiny spaces |
| Thin underline | Satin | Holds a clean line |
| Shadow effect | Fill in a darker color | Fakes depth with thread |
Smallest Text, Thin Lines and Gradients on Embroidery
Thread has width. A line cannot be thinner than the thread itself. We do not guess limits here. The free proof flags anything too fine.
Gradients are the most common surprise. Thread comes in solid colors. A designer can fake a blend with rows of two colors. Up close, it reads as stripes.
| Element | Stitches well? | Workaround |
|---|---|---|
| Bold sans-serif text | Yes | Keep strokes wide |
| Thin serif text | Often not | Switch to a bold weight |
| Hairlines | Rarely | Thicken the line |
| Gradients | No | Use clear color steps |
| Tiny dots | No | Enlarge them or drop them |
| Photos | No | Try a printed option |
| Small serif text | Often not | Use a sturdy typeface |
| Outlined text | Sometimes | Fill the letters instead |
| Overlapping shapes | Sometimes | Separate the layers |
| Neon colors | Matched to Pantone | Check the proof |
Most artwork needs small fixes. We make them at proof stage. You approve each change before sewing.
- Pick bold, simple letter shapes
- Merge shapes that nearly touch
- Limit the color count
- Remove shadows and glows
- Keep gaps between shapes wide
- Convert thin outlines to solid shapes
- Avoid overlapping shapes
- Thin outlines become solid shapes
- Tiny text grows to a bolder weight
- Gradients become clean color steps
YOUR OPTIONS
Embroidered Patch Options: Coverage, Border, Backing and Puff
Five choices shape the finished patch. Each one changes look, weight and cost. Pick them in the order below.
- Coverage sets weight and look
- Border sets edge wear
- Backing sets how it attaches
- Puff sets height
- Size sets where it fits
Thread Coverage: 50%, 75% or 100%
Coverage sets how much twill shows. It also changes how custom patch embroidery feels. Denser stitching is heavier, stiffer and slower to sew.
Take a 50% patch. Rows of thread run with gaps between them. The twill color becomes part of the design. Pick that twill color on purpose.
| Coverage | Look | Feel | Good for |
|---|---|---|---|
| 50% | Twill shows through | Light and flexible | Simple logos, soft garments |
| 75% | Mostly thread, some twill | Balanced weight | Most everyday patches |
| 100% | Fully stitched surface | Dense and firm | Bold art, heavy wear |
Simple art on a soft garment. The twill color joins the design.
A balanced pick. Most everyday patches land here.
Bold art that must look solid. Heavy wear suits it too.
| Coverage | Thread use | Weight | Cost direction |
|---|---|---|---|
| 50% | Low | Light | Lower |
| 75% | Medium | Medium | Middle |
| 100% | High | Heavy | Higher |
- Higher coverage adds weight
- Higher coverage adds stiffness
- Lower coverage lets twill color show
- Lower coverage bends with soft fabric
Twill color matters at lower coverage. A black twill makes bright thread pop. A white twill softens it. Tell us your base color on day one.
Border Styles: Merrowed, Die-Cut and Hot-Cut
The border is the first thing people see. It also decides how well the edge resists wear. Good custom patch embroidery starts with the right edge.
| Border | Edge look | Best for | Watch out |
|---|---|---|---|
| Merrowed | Raised thread wrap | Round and square shapes | Slight edge thickness |
| Die-cut | Cut to shape, clean edge | Simple outlines | Cut edge can show twill |
| Hot-cut | Heat-sealed cut edge | Odd and complex shapes | Flatter, less raised look |
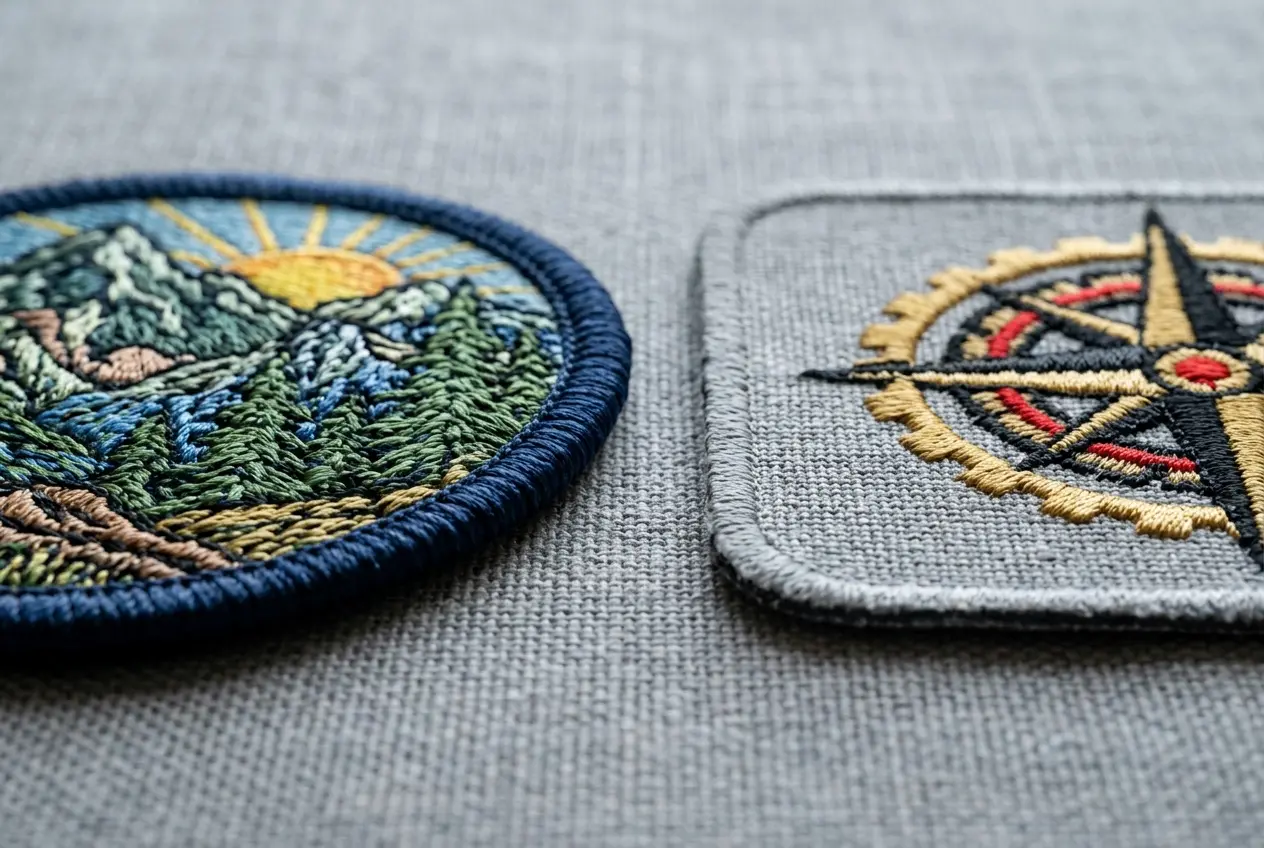
Pros
- Merrow wraps the edge in thread
- Wrapped edges resist fraying
- Classic badge look
Limits
- Adds a slight edge thickness
- Tight curves need more care
Merrow stitching is also called overlock. It wraps the raw edge in thread. A hot knife seals a cut edge with heat instead.
- Merrow
- A machine that wraps thread over the raw edge.
- Overlock
- Another name for merrow stitching.
- Hot knife
- A heated blade that cuts and seals the edge.
Round, square and shield shapes suit a merrowed edge. Complex outlines suit hot-cut. Cutouts need extra planning, so flag them early.
| Shape | Usual border | Reason |
|---|---|---|
| Circle | Merrowed | Even wrap all round |
| Rectangle | Merrowed | Straight, clean wrap |
| Shield | Merrowed | Handles the point well |
| Custom outline | Hot-cut | Follows odd curves |
| Cutout letters | Hot-cut | Tight spaces need sealing |
Which Backing Suits Thick Embroidered Thread?
Dense thread needs a stable base. The backing must grip without bending the patch. Heavy coverage calls for a firmer backing.
A thin backing can curl under a heavy patch. A firm one stays flat. Think about weight before you pick.
| Backing | Fit for thick thread | Note |
|---|---|---|
| Sew-on | Very good | Stitched through the edge |
| Iron-on | Good | Heat-activated adhesive |
| Velcro | Very good | Removable and reusable |
| Adhesive | Light use | Best for temporary wear |
| Garment | Common backing | Reason |
|---|---|---|
| Jacket | Sew-on | Holds heavy patches |
| Cap | Sew-on or iron-on | Fits curved crowns |
| Uniform | Velcro or sew-on | Easy to swap |
| Bag | Velcro | Removable |
- Check the patch weight first
- Check the garment fabric next
- Decide if you need to swap patches
- Add edge stitches for heavy wear
- Test on a scrap if unsure
Iron-on backing adds a heat-activated layer. Heavy thread still gains from a few edge stitches. Velcro suits patches you swap often.
Want every option side by side? Open the full backing guide.
3D Puff Embroidery for Raised Lettering and Caps
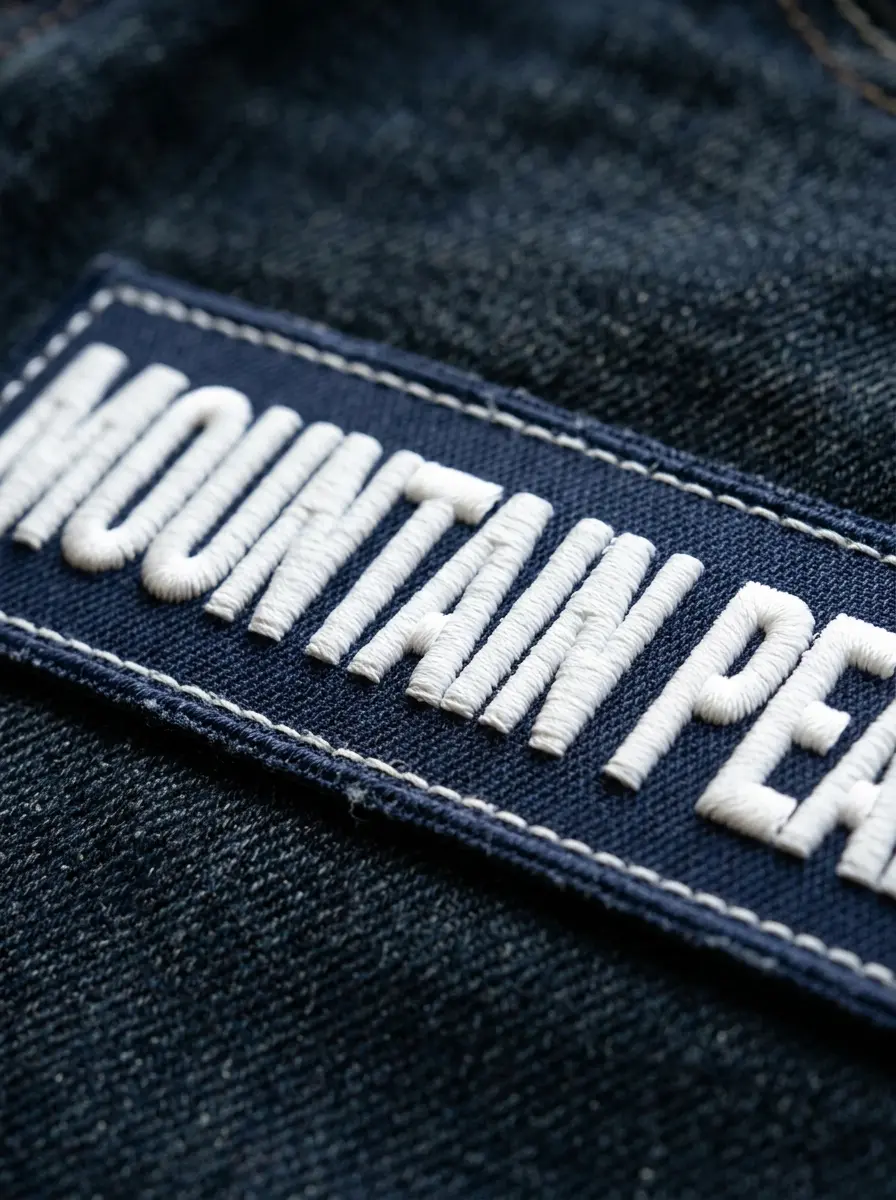
Puff stitching sews thread over a foam layer. The foam lifts the letters off the twill. It looks bold on caps and chunky lettering.
Raised letters catch light and shadow. That gives them depth from across a room. Caps are the classic home for this look.
- Foam sits under satin stitches
- Letters stand clear of the twill
- Works best on bold block text
- Thin lettering does not suit puff
- Caps show it off best
Puff has limits. Thin letters trap foam and look messy. Small text loses its shape. Keep puff for bold words and simple marks.
- Foam goes down
A foam layer sits on the twill.
- Stitches cover it
Satin stitches wrap the foam tight.
- Foam trims
Excess foam is removed from the edges.
- Letters stand up
The raised shape is ready to wear.
| Feature | Flat stitch | Puff stitch |
|---|---|---|
| Height | Low | Raised |
| Best text | Fine and bold | Bold only |
| Weight | Lighter | Heavier |
| Cap fit | Good | Best |
| Your goal | Best choice | Why |
|---|---|---|
| Soft, flexible feel | 50% coverage | Less thread, more drape |
| Bold, solid look | 100% coverage | Twill fully covered |
| Raised lettering | 3D puff | Foam lifts the letters |
| Swap patches often | Velcro backing | Peels off and back on |
| Heavy daily wear | Sew-on backing | Stitched through the edge |
| Odd custom shape | Hot-cut border | Follows tight curves |
Large Custom Embroidered Patches: Size Guide by Placement
Size depends on where the patch goes. These are typical ranges, not our limits. We confirm the size on your proof.
Bigger patches show more detail. They also use more thread. Weight rises fast, so choose firm backing.
| Placement | Typical width | Border | Tip |
|---|---|---|---|
| Chest logo | 3 to 4 inches | Merrowed | Keep text bold |
| Sleeve | 2 to 3 inches | Merrowed | Avoid fine detail |
| Cap front | 2 to 2.5 inches | Merrowed | Consider puff |
| Backpack | 3 to 4 inches | Merrowed | Add velcro |
| Hoodie chest | 3 to 4 inches | Merrowed | Mind the pocket line |
| Jacket back | 10 to 12 inches | Merrowed | Use 75% or 100% |
| Tote bag | 4 to 6 inches | Merrowed | Pick firm backing |
| Vest back | 8 to 12 inches | Merrowed | Plan for weight |
Weight matters on large pieces. A big patch on thin fabric can sag. Pair it with a firm backing and edge stitches.
- Measure the garment area first
- Leave a margin around the patch
- Larger patches weigh more
- Pick firm backing for big pieces

ORDER SIZE
Custom Embroidered Patches No Minimum: Order 1 to 100,000
You can order one patch or one hundred thousand. Single custom embroidered patches run $8-15 each. Price drops as quantity rises.
UK shoppers ask for custom embroidered badges no minimum. The answer is the same. One is fine.
| Order size | Allowed | Price note |
|---|---|---|
| 1 patch | Yes | $8-15 each |
| 100 patches | Yes | Quote shows the price |
| 500+ patches | Yes | From $0.30 each |
| 100,000 patches | Yes | Quote shows the price |
| Every order | Free proof | Within 24 hours |
- Same rule for custom embroidery patches no minimum on any shape
- Same free proof on small orders
- Same revisions on small orders
- Same Pantone matching on small orders
- Order one to test a design
- Order 100 for a club or event
- Order 500 or more for the lowest unit price
The price per patch falls as the run grows. Digitizing happens once, and machines sew many patches at once. That is why bigger runs cost less each.
Small runs are normal here. Many buyers start with one patch. They check fit, then reorder in volume. Custom embroidered patches no minimum applies to every border and backing.
Order one patch. Check fit, color and feel.
Order a small set for a team or an event.
Order in volume. Per-patch cost drops.
Want live figures? See the pricing page.
BY GARMENT
Custom Made Embroidered Patches by Garment: Size, Border and Backing
Buyers of custom embroidered badges usually start with the garment. Jackets, caps and bags each ask different things. Shoppers who want custom made embroidered badges can use the same chart.
Pick your garment first. The chart below shows usual choices. Your proof confirms the final size.
| Garment | Usual size | Border | Backing | Thread coverage |
|---|---|---|---|---|
| Jacket | Large | Merrowed | Sew-on | 75% or 100% |
| Cap | Small | Merrowed | Sew-on | 75% or puff |
| Uniform | Medium | Merrowed | Sew-on or velcro | 75% |
| Bag | Medium | Merrowed | Sew-on or velcro | 75% or 100% |
| Denim | Any size | Merrowed | Sew-on | Any coverage |
- Pick the garment
- Choose the placement
- Cut a paper template
- Pin it and check the fit
- Send us the final size
Answer three questions first. Where does it go? How big can it be? How will it attach? Those three answers shape every other choice.
- Test the placement with paper first
- Round caps need a smaller patch
- Keep sleeve patches flat
- Add velcro for swappable patches
Wearers notice fit before they notice thread. A patch that is too big on a cap looks wrong. A patch that is too small on a jacket vanishes.
Each garment has its own rules. See jacket patches or hat patches for the details.
| Garment | Check first | Common mistake |
|---|---|---|
| Jacket | Seam position | Patch too small |
| Cap | Crown curve | Patch too wide |
| Uniform | Dress code rules | Wrong placement |
| Bag | Fabric thickness | Weak backing |
| Denim | Wash plans | Skipping edge stitches |
| Hoodie | Pocket and seam lines | Ignoring fabric stretch |
YOUR ARTWORK
Artwork Checklist for a Clean Embroidery Stitch File
Clean art stitches clean. Send the best file you have. A vector file keeps edges sharp for the digitizer.
- Vector
- Built from lines and shapes. It scales cleanly and keeps edges sharp.
- Raster
- Built from pixels. It blurs when enlarged, so we redraw it by hand.
| Format | Type | Note |
|---|---|---|
| AI | Vector | Best choice |
| EPS | Vector | Best choice |
| Vector | Best choice | |
| PNG, JPG | Image | We redraw it |
| SVG, PSD, BMP, TIF | Accepted | We check it |
- Gather
Collect your logo files in one folder.
- Clean
Remove shadows, glows and stray marks.
- Mark
Note your Pantone colors and target size.
- Send
Upload the file and wait for the proof.
- Use solid color areas
- Send vector files when possible
- Name your Pantone colors
- Make text bold and simple
- Skip tiny dots
- Show the size you want
- Flag any must-keep detail
Do not redraw your logo to fit thread. Send the original. We simplify only what must change, and you approve each change.
| Problem | Our fix |
|---|---|
| Thin outline | Thicken or drop it |
| Tiny text | Enlarge or simplify |
| Gradient | Replace with color steps |
| Too many colors | Merge close shades |
| Shapes touching | Add clear gaps |
- Merge near-identical shades into one thread
- Keep outlines bold enough to read at arm's length
- Use open twill as a free background color
- Cut gradients into two or three flat bands
Color count shapes the stitch file more than size does. Each color is a thread change on the machine. Most designs sit well at six to ten colors. Past twelve, the stitching gets crowded. Pick the colors that carry the message. Let the twill show through where you can.
- Ask us about any file you doubt
- Keep the layered original if you have one
THE PROCESS
How We Make Your Custom Embroidered Patches, Step by Step
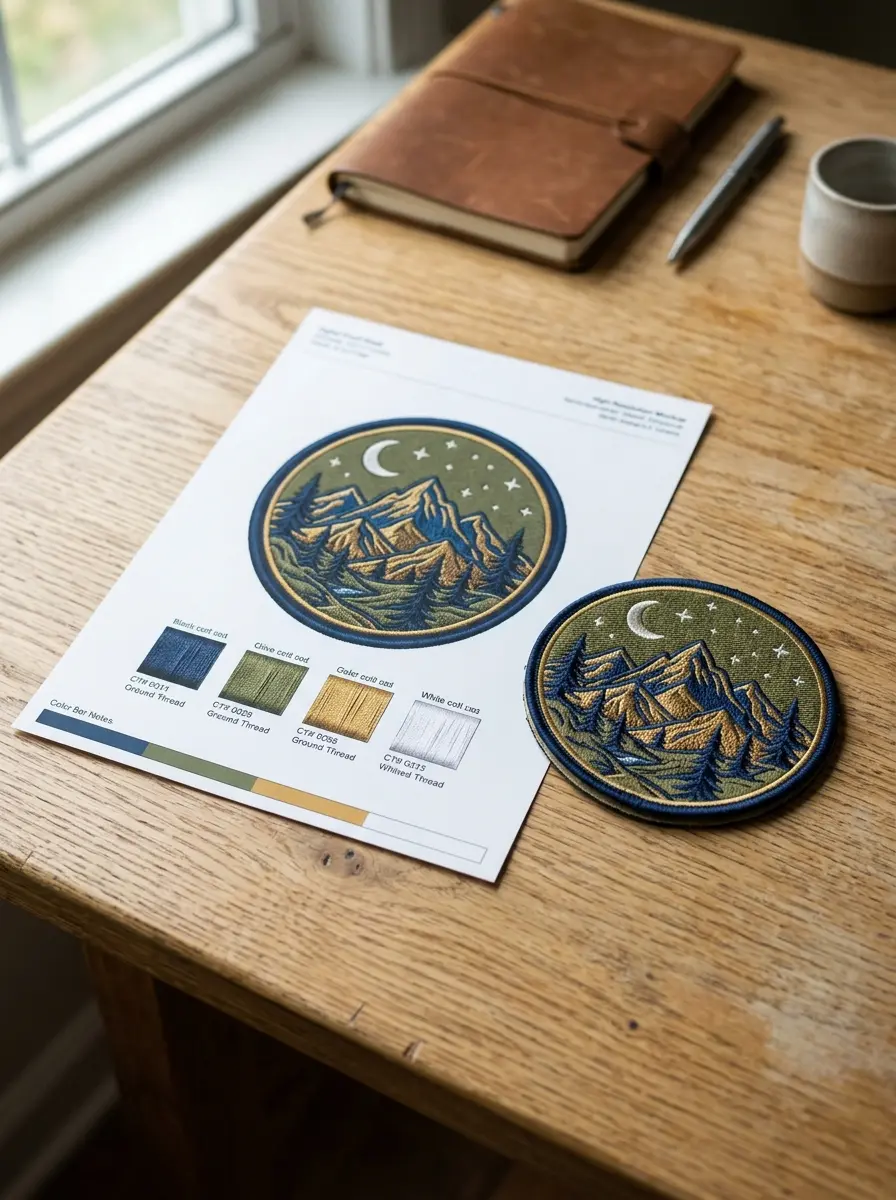
Want to make custom embroidered patches without owning a machine? We run every step. You only approve the proof.
Every order follows one path. The path is the same for 1 patch or 10,000. Only the production run changes.
- Send artwork
Upload your file and tell us the size. Add Pantone colors if you have them.
- Get your proof
A Pantone-matched proof arrives in 24 hours. It shows color, size and border.
- Approve it
Change it as often as you need. Revisions are free.
- We stitch
Production takes 10 to 14 business days. Rush takes 5.
- It ships
Duty-free shipping goes to 50+ countries.
- Your proof arrives first
- Production starts after approval
- Duty-free shipping closes the loop
| Stage | Time | Note |
|---|---|---|
| Digital proof | 24 hours | Free and Pantone matched |
| Standard production | 10 to 14 business days | After proof approval |
| Rush production | 5 business days | After proof approval |
| Shipping | Duty-free worldwide | 50+ countries |
Approve a Free Pantone-Matched Embroidery Proof in 24 Hours
The proof is your safety net. You see thread colors, size and border before we sew. Nothing is sewn until you say yes.
Check three things on it. Check spelling first. Check colors second. Check the border last. Ask for changes until it looks right.
| Item | Shown on proof |
|---|---|
| Size | Width and height |
| Colors | Pantone-matched threads |
| Border | Edge style |
| Coverage | Thread density |
| Backing | Your chosen type |
- Pantone-matched thread colors
- Border and coverage shown
- Unlimited free revisions
- No sewing until you approve
What Happens on the Embroidery Floor in 10 to 14 Business Days
Multi-head machines stitch many patches at once. Each head repeats the same file. Edges are finished and backings are added.
Standard production runs 10 to 14 business days. That clock starts when you approve the proof. Rush orders run 5 business days from the same point.
- Load
Thread is loaded by color.
- Stitch
Heads sew the same design together.
- Finish
Edges are wrapped or cut.
- Back
Backing is applied.
- Ship
Patches are packed and sent.
Order Custom Embroidered Patches: Standard or Rush Timing
Rush is for firm deadlines. It runs faster than standard. Mention your date when you upload artwork.
Standard timing suits most orders. Choose rush when a date is tight. Both start after you approve the proof.
- Plan standard for events weeks away
- Use rush for hard deadlines
- Approve the proof fast to save time
| Option | Time | Best for |
|---|---|---|
| Standard | 10 to 14 business days | Planned orders |
| Rush | 5 business days | Tight deadlines |
| Stage | You do | We do |
|---|---|---|
| Artwork | Upload the file | Check the shapes |
| Proof | Approve or revise | Match Pantone colors |
| Production | Wait | Stitch and finish |
| Delivery | Receive | Ship duty-free |

WHO BUYS
Who Orders Embroidered Patches: Brand Merch, Staff Badges and Team Sets
Three groups order most. Each one wants a different thing from a patch.
A logo patch turns a plain cap into a product. Small runs test a design before you scale up.
A custom embroidered badge marks a role. It sews onto shirts and jackets, and it looks tidy.
Clubs order matching sets. Personalized embroidered patches add names or numbers to each one.
| Buyer | Typical need | Popular choices |
|---|---|---|
| Brand | Merch and caps | Puff, iron-on |
| Business | Staff badges | Merrowed, velcro |
| Club | Matching sets | Sew-on, 75% |
| Seller | Stock to resell | Volume pricing |
| School | Uniform crests | Velcro, sew-on |
| Crew | Event badges | Iron-on, velcro |
- Reorder
- Repeat the same design later. Keep your proof and Pantone colors on file.
- Variation
- Change one detail, such as a name or a number, and keep the rest.
- Set
- Match several patches in size and border for a team or crew.
- Keep your approved proof for reorders
- Name the same Pantone colors again
- Order extra for next season
- Match the size across sets
Clubs often order in two waves. The first wave covers current members. The second covers new joiners. Ask us to reuse your approved stitch file, so both waves match.
- Staff badges: place the name line below the logo
- Team sets: keep one border color across every patch
- Brand merch: leave room around the logo for clean edges
Orders vary a lot. One brand wants 50 caps. A school wants 2,000 uniforms. The process stays the same for both.
See also name patches and team and club patches.
DURABILITY
How Long Embroidered Patches Last: Thread, Twill and Edge Wear
Good custom embroidered patches last for years of normal wear. Thread, twill and edge each play a part.
| Factor | What it does | Result |
|---|---|---|
| Polyester thread | Resists fading | Color holds |
| Twill base | Gives a firm base | Shape holds |
| Merrowed edge | Wraps the border | Resists fraying |
| Backing | Anchors the patch | Choose by use |
| Care | Gentle handling | Longer life |
Pros
- Thread color holds well
- Wrapped edges resist fraying
- Firm shape
Limits
- Heavy heat can harm adhesive
- Rough washing wears thread
Embroidered patches handle daily wear well. Jackets, caps and bags all test them. Sun, rain and washing come next.
Backing affects life span too. Sew-on backing holds through rough use. Velcro suits patches you move often.
- Wash gently and air dry
- Keep high heat off adhesive backing
- Sew on patches that see rough use
- Store spare patches flat
Wear shows first at the edge. A wrapped border protects it. Backing choice matters too. Sew-on backing holds through rough use.
- Fading
- Sun and washing dull color over time. Polyester thread resists it.
- Fraying
- Loose edge threads unravel. A wrapped border prevents it.
- Puckering
- Tight stitching can pull the twill. Good digitizing prevents it.
| Do | Do not |
|---|---|
| Check for loose edges | Ignore fraying |
| Wash gently | Scrub the stitching |
| Air dry | Use high heat |
| Press with a cloth | Press hard on thread |
| Store flat | Fold sharply |
Edge wear is the first sign of age. Thread across the face holds up well. Corners and points take the most rubbing. Rounded shapes wear more evenly than sharp ones. If a patch lives on a bag strap, pick a rounded outline.
Need care steps? Read the care guide.
DIY OR ORDER
Home Embroidery Machine or Factory Order? A Fair Comparison
A home machine can sew one patch. Custom patch embroidery at home needs a machine, digitizing skills and time.
Patch makers once used Schiffli machines, first built in 1863. Today multi-head machines stitch many patches at once. A home machine has one needle.
| Factor | Home machine | Factory order |
|---|---|---|
| Speed | One at a time | Many at once |
| Digitizing | You do it | We do it |
| Cost for one | Machine purchase | $8-15 patch |
| Edge | Hand finish | Merrowed edge |
| Repeat batches | Varies | Same file each run |
- Single-needle
- A home machine. It sews one color at a time.
- Multi-head
- A factory machine. Many heads sew the same design together.
- Hoop
- A frame that holds the twill tight while the needle sews.
Cost depends on how you count. A home machine has a purchase price. Your time has value too. A single factory patch is $8-15.
- You enjoy the craft itself
- You need one quick test
- You already own a machine
- The design is very simple
| Situation | Better route |
|---|---|
| One craft project | Home machine |
| Matching team set | Factory order |
| Brand merch run | Factory order |
| Learning a new hobby | Home machine |
- Home machines suit a single hoop-sized patch.
- Factory runs suit a matched set of many.
- Thread colors differ between spools and brands.
- A factory proof shows the match before stitching.
A fair rule applies. Learn the craft at home if you enjoy it. Order if you need volume, speed or a clean edge.
Curious about DIY? Read the DIY patch guide.
READY TO ORDER
Start Your Embroidered Patch Order: Free Proof in 24 Hours
Upload Artwork
Send any common file format.
Approve Your Proof
Free digital proof within 24 hours.
We Ship Worldwide
Standard 10 to 14 business days. Rush in 5.
Upload your art and get a free proof for your custom embroidered patches.
No minimum. Free proof in 24 hours. Ships to 50+ countries.
COMMON QUESTIONS
What Buyers Ask Before Ordering Embroidered Patches
Where can I buy embroidered patches made from my own design?
Buy here, online. You upload artwork and approve a free proof. We ship duty-free to 50+ countries. We make custom embroidered patches online only. We never sell ready-made stock. Send your file and see a proof within 24 hours.
How do I get my logo stitched into an embroidered patch?
Four steps turn a logo into a custom embroidered badge. Upload your art. Approve the free proof, which arrives in 24 hours. We stitch the patch in 10 to 14 business days. Then it ships to you.
Who makes the best embroidered patches?
Judge any maker on four points. Check the thread, the border, the proof and the guarantee. Ask who sees the proof first. We use polyester thread. We send a free proof. Every order has a 100% quality guarantee.
Do craft stores stitch custom embroidered patches or only sell stock?
Craft stores mostly sell ready-made stock patches. You pick from what is on the shelf. We only make custom ones. Send your artwork and we stitch it to order. Nothing here is premade.
Are embroidered patches durable?
Yes. Polyester thread, a twill base and a wrapped edge give long wear. Every order has our 100% quality guarantee. Gentle washing and low heat add more life. Heavy abrasion will wear any thread eventually.
Can I get embroidered patches with iron-on or velcro backing?
Yes. Choose sew-on, iron-on, velcro or adhesive backing. Each suits different garments. Velcro suits patches you swap. Sew-on suits heavy wear. See the backing guide to compare them side by side.
Is stitching a single embroidered patch at home cheaper than ordering one?
Not always. Home stitching needs a machine, digitizing skills and hours of time. Want to make a custom embroidery patch yourself? Read the DIY guide. Or order one here for $8-15.
What is the cheapest machine that makes custom embroidery patches?
Home single-needle machines cost least. They sew one patch at a time and you digitize the design yourself. A factory order is cheaper per patch at volume. It also includes digitizing and finishing.
Where can I find handmade embroidery patches?
Craft marketplaces sell handmade patches. Ours are machine-made to your artwork. That gives consistent results across the whole batch. Handmade suits one-off crafts. Machine-made suits teams, brands and repeat orders.
Can embroidered patches reproduce photo-style gradients?
Not smoothly. Thread cannot blend like ink. Gradients become clear color steps instead. Up close, they read as bands. For photo detail, try a printed patch. The free proof shows the result.
What does 75% thread coverage mean on an embroidered patch?
Thread covers 75% of the twill. Some base fabric shows through. It is lighter and more flexible than 100%. Pick the twill color on purpose. See the coverage section for the full comparison.
Which stitch types does an embroidered patch use?
Satin stitch fills lettering and narrow shapes. Fill stitch covers large areas. Run stitch draws fine outlines. Each does a different job. A good digitizer mixes all three inside one patch.
What is the smallest text an embroidered patch can hold?
It depends on font weight. Bold sans-serif holds best. Thin lines and small serif text often fail. Thread has width, so tiny letters blur. The free proof flags any text that is too small.
Should I pick a merrowed or hot-cut border?
Merrowed wraps the edge in thread. It suits round and square shapes. Hot-cut seals the edge of shaped patches. It suits odd outlines. Check the border section for a side by side table.
How many thread colors can one embroidered patch hold?
Most designs run well at six to ten colors. Each extra color adds a thread change on the machine. Fewer colors keep the stitch file clean and the finish bold.
Can the twill background color show through the stitching?
Yes, on purpose. Open areas let the twill color become part of the design. Dense fills hide it. Tell us which areas stay open, and the proof will match.
KEEP EXPLORING